Dive into the nuanced parameters behind the 'Spiral Effect' and tap into the AI's potential to generate interesting visual illusions.
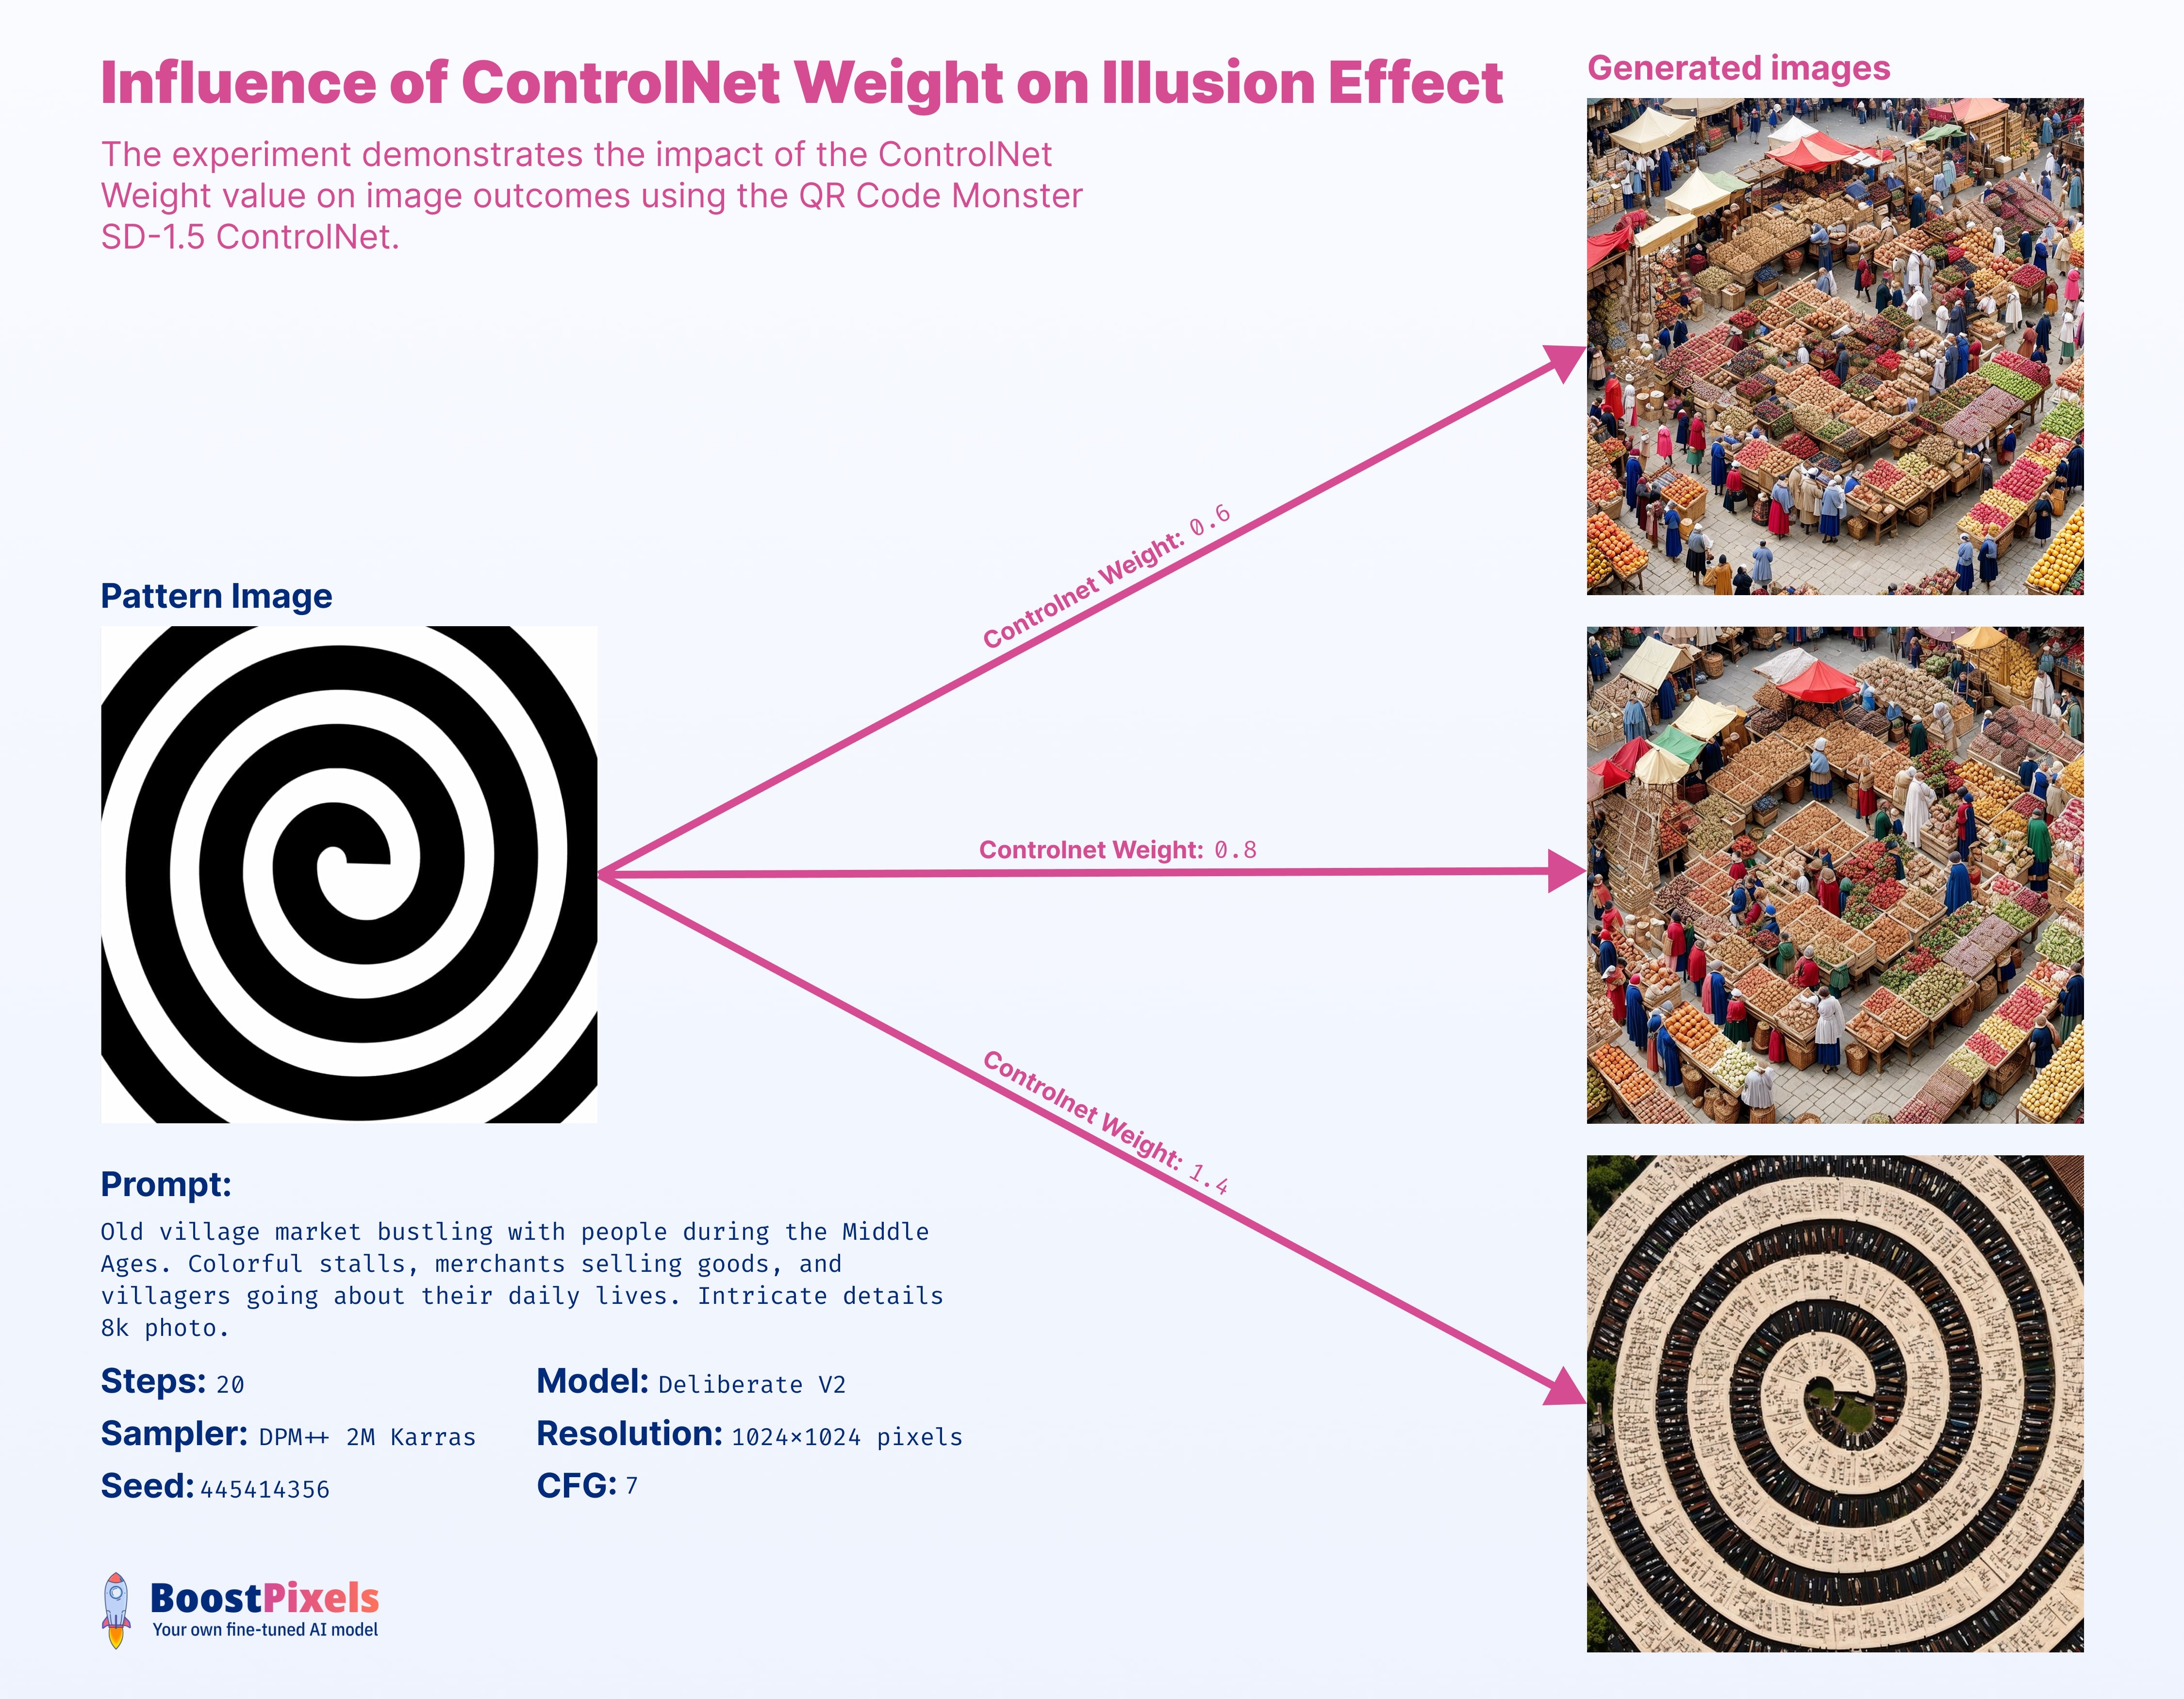
ControlNet Weight
ControlNet Weight plays a pivotal role in achieving the 'Spiral Effect' through Stable Diffusion. Striking the right balance is crucial. This value defines the influence of the ControlNet input pattern. Too low? Pattern's invisible. Too high? Illusion is lost.
This value really depends on the effect you want to achieve and the specific prompt you enter. There's no one-size-fits-all static setting.
The relationship between ControlNet Weight and resolution parameter is very strong. At 1024px, 0.8 already has a lot of influence on the output image. However, for lower resolutions like 768px or 512px, the value needs adjustment to higher ranges like 1.4 to 2 to ensure the pattern's visibility in the output image.
Resolution
It's somewhat unexpected that resolution wields such profound influence on the 'Spiral Effect'. The crux of this impact lies in how resolution determines the repetitive objects aligning with the input pattern.
The higher the resolution is set, it creates a zoomed out view. The lower the resolution, it generates a more zoom in image with also more accurate representation of the prompt intent.
At 512px, the limited resolution challenges the visibility of patterns, making it difficult to achieve their desired forms. At 1024px, while patterns become detailed visible —suiting some objects and prompts— it can sometimes lead to redundant repetitions. 768px strikes a balance, minimizing these concerns. This makes models like 'Deliberate' especially ideal, because they are a bit better at generating images at this resolution.
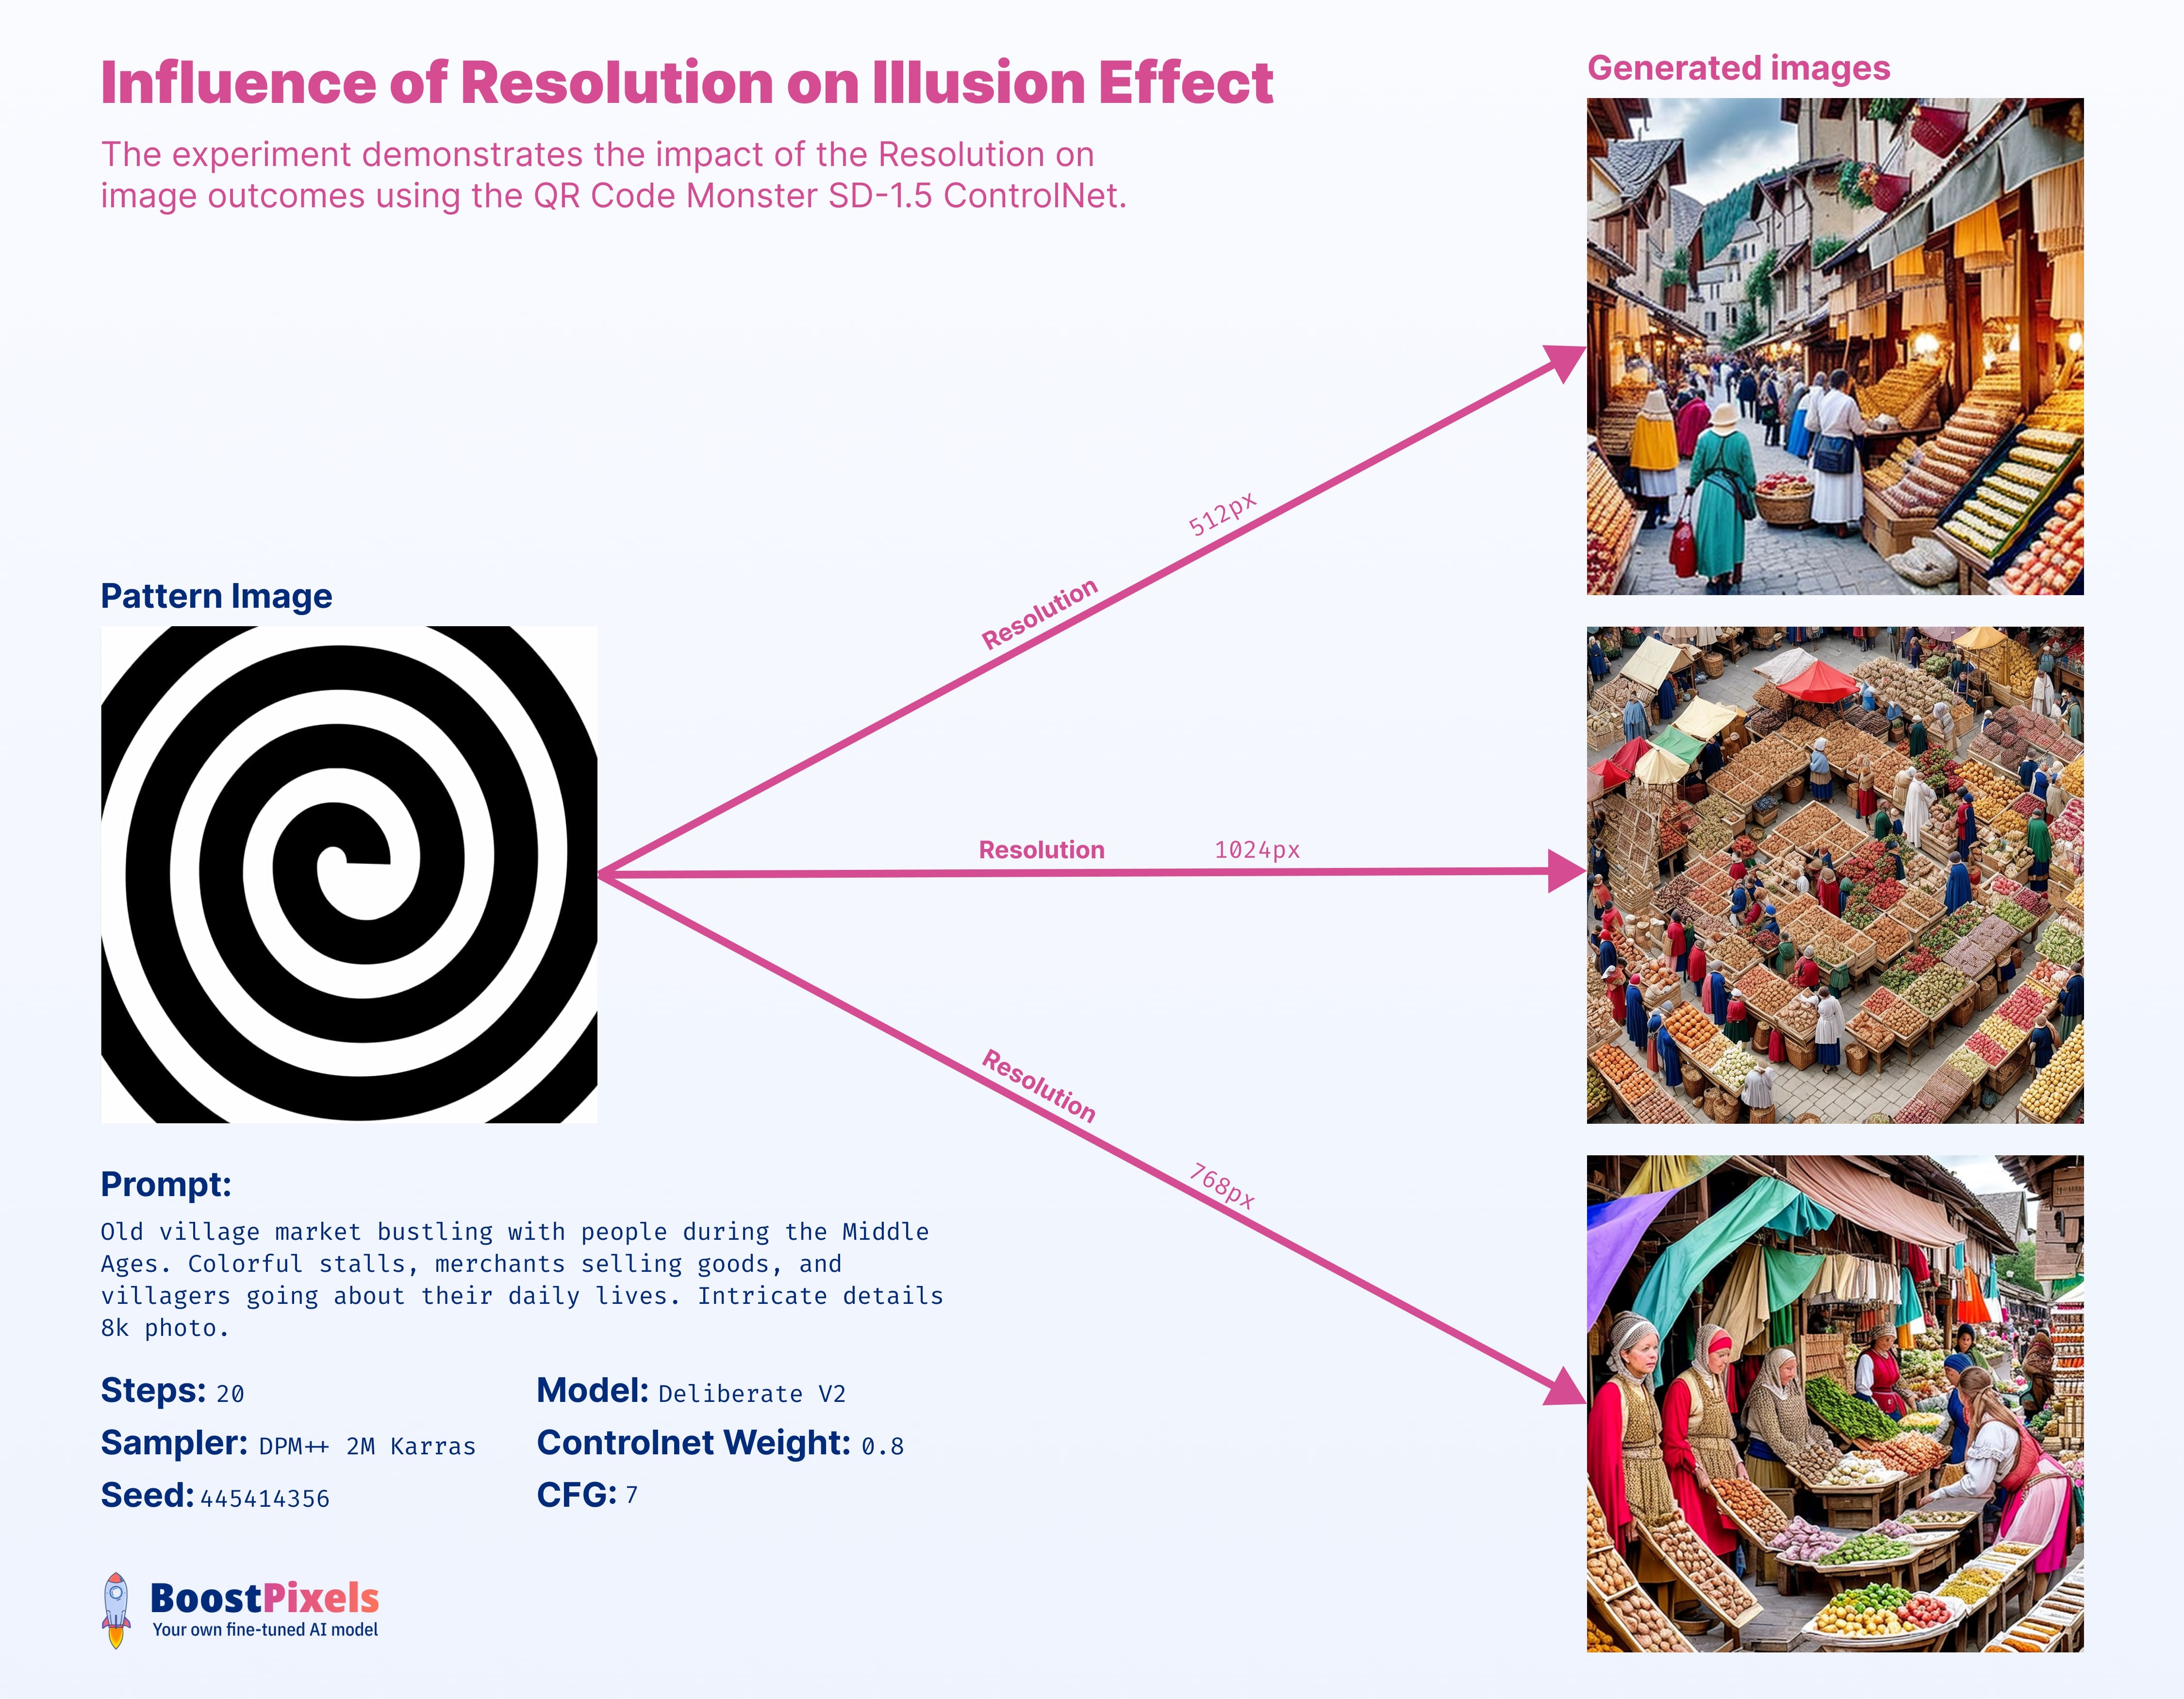
Resolution choice is a blend of artistic intent and technical considerations. While some settings optimize details, the final decision often hinges on individual aesthetic goals and the desired visual style.
As expected, as resolution rises, so does the generation duration. To be precise, 1024px requires approximately 16 seconds, 768px around 10 seconds, and 512px close to 6 seconds.
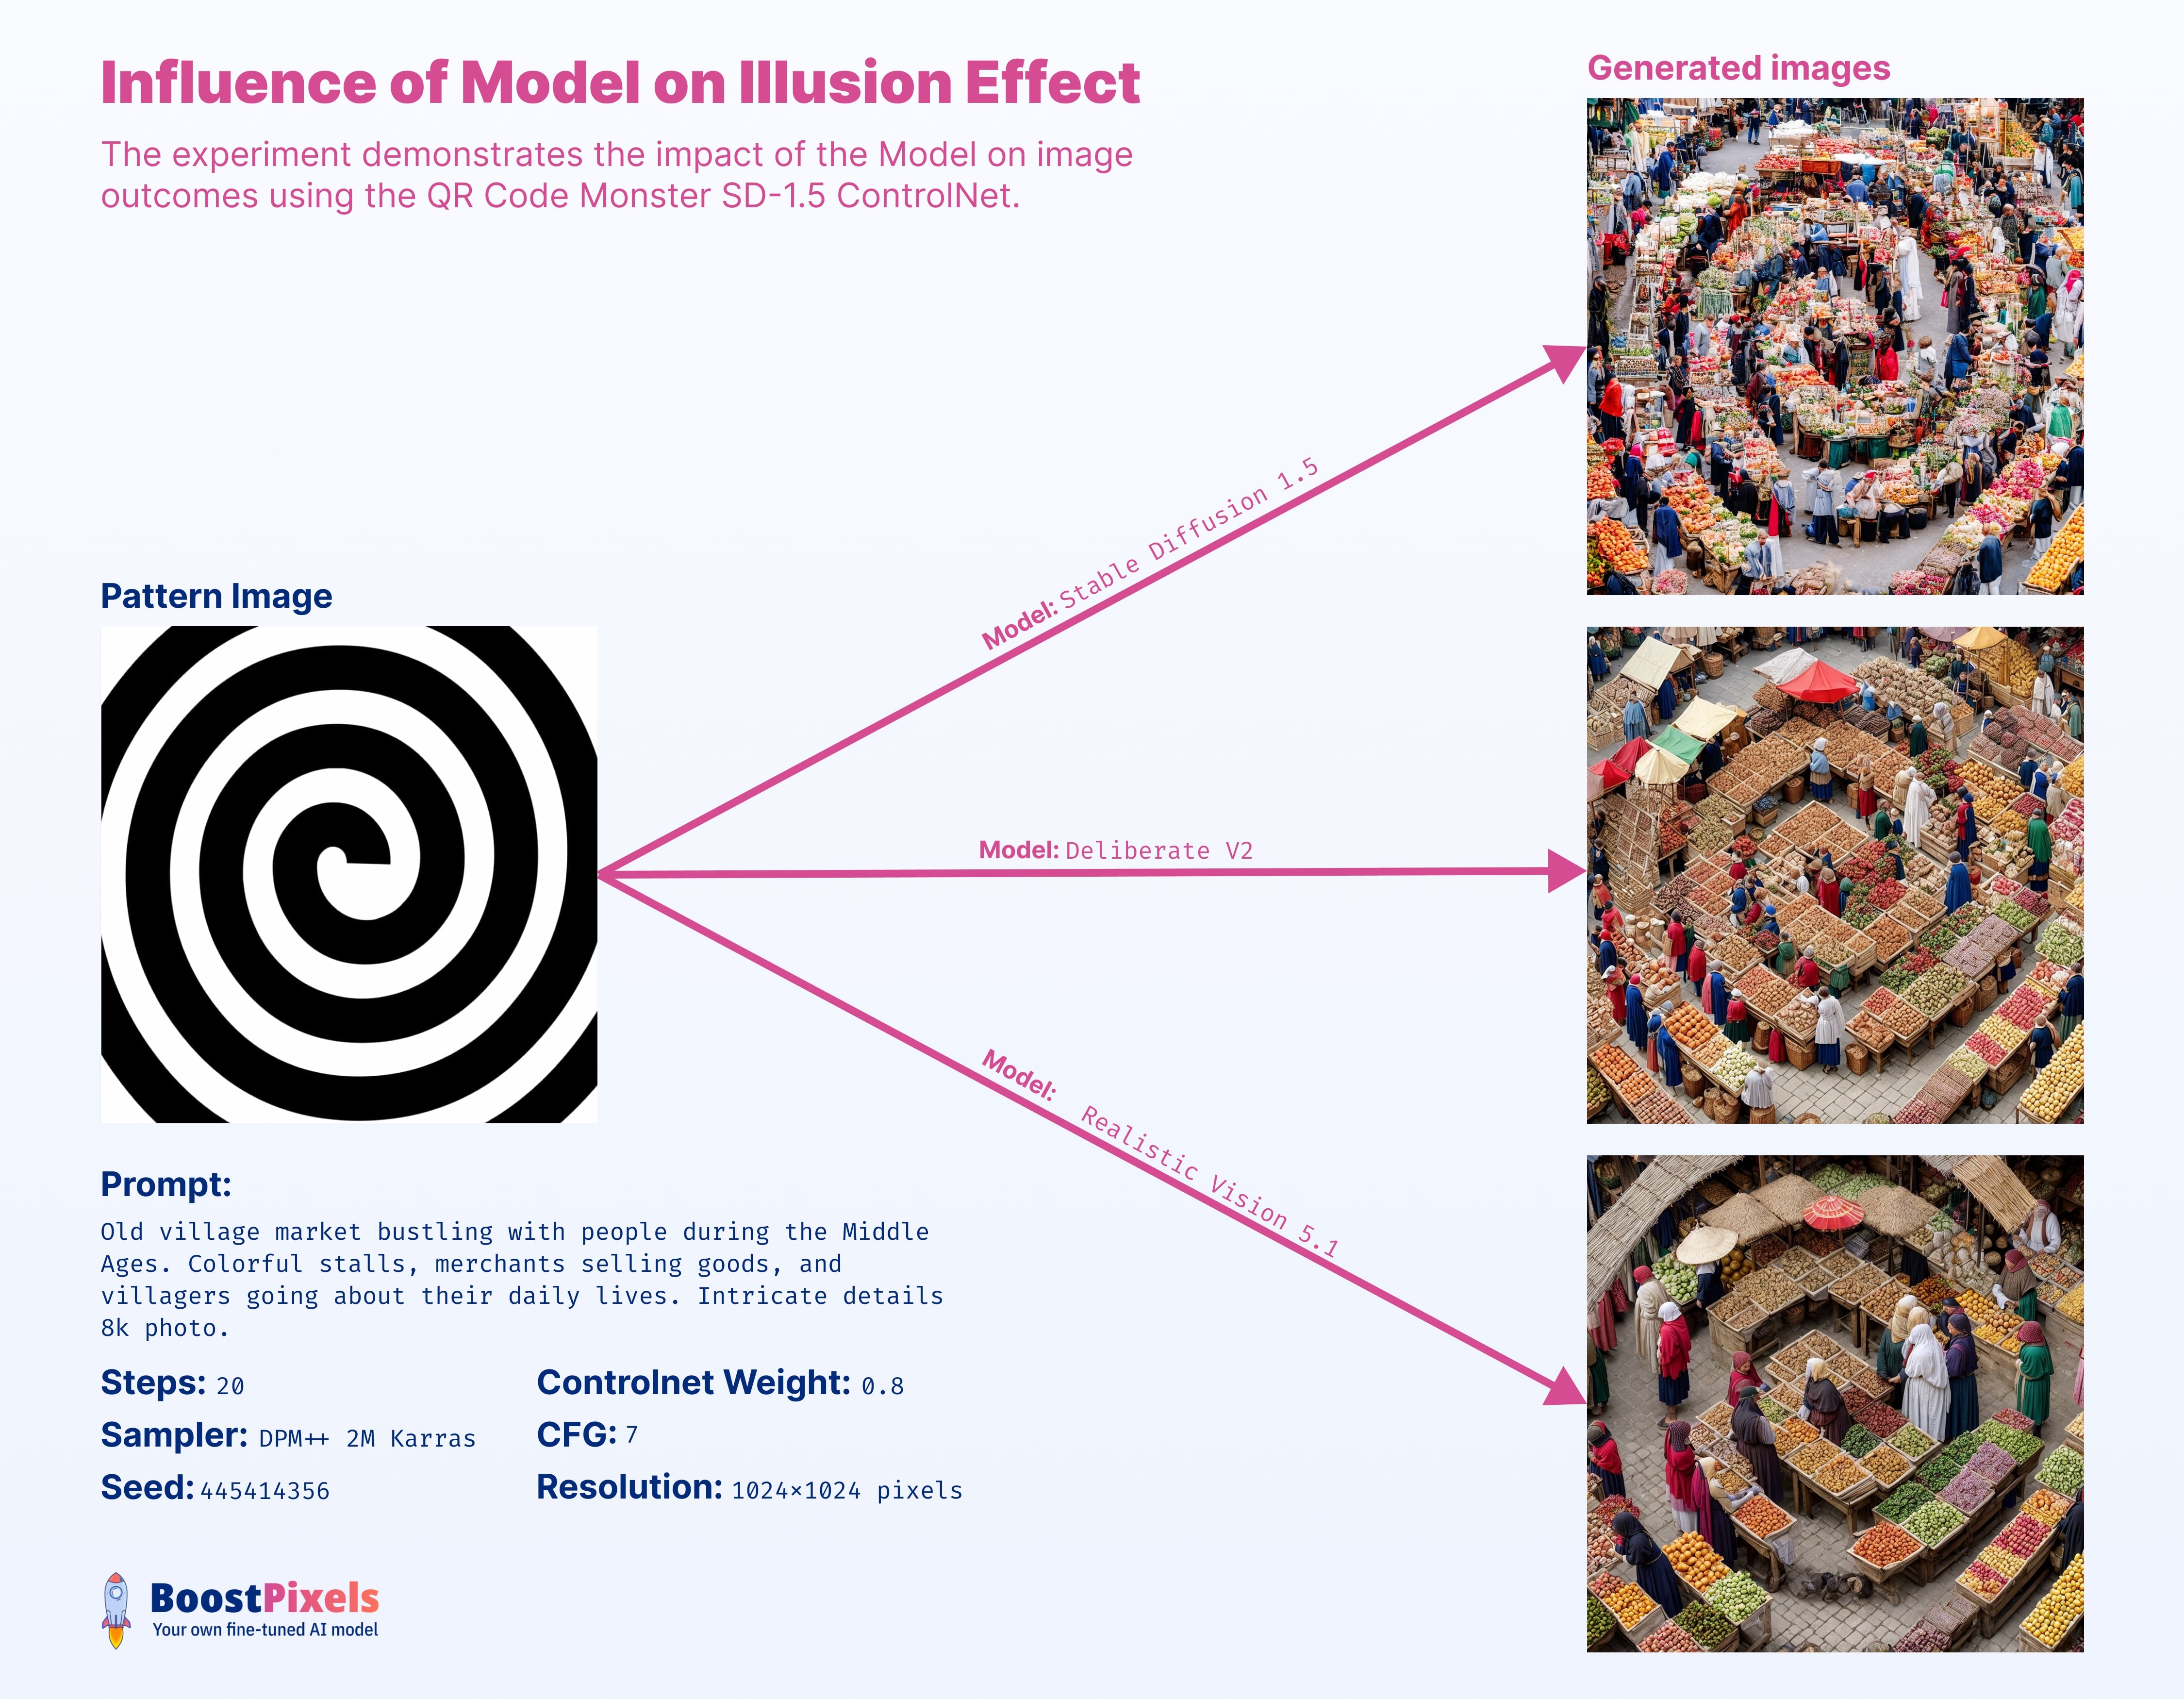
Model
The chosen model greatly influences the final output. The Stable Diffusion base model 1.5 excels in crafting 'natural' visuals. In contrast, 'Deliberate' offers a sleek, shiny finish, while 'Realistic' has a moodier tone. Fine-tuned models, meanwhile, enhance details and offer less distortion.
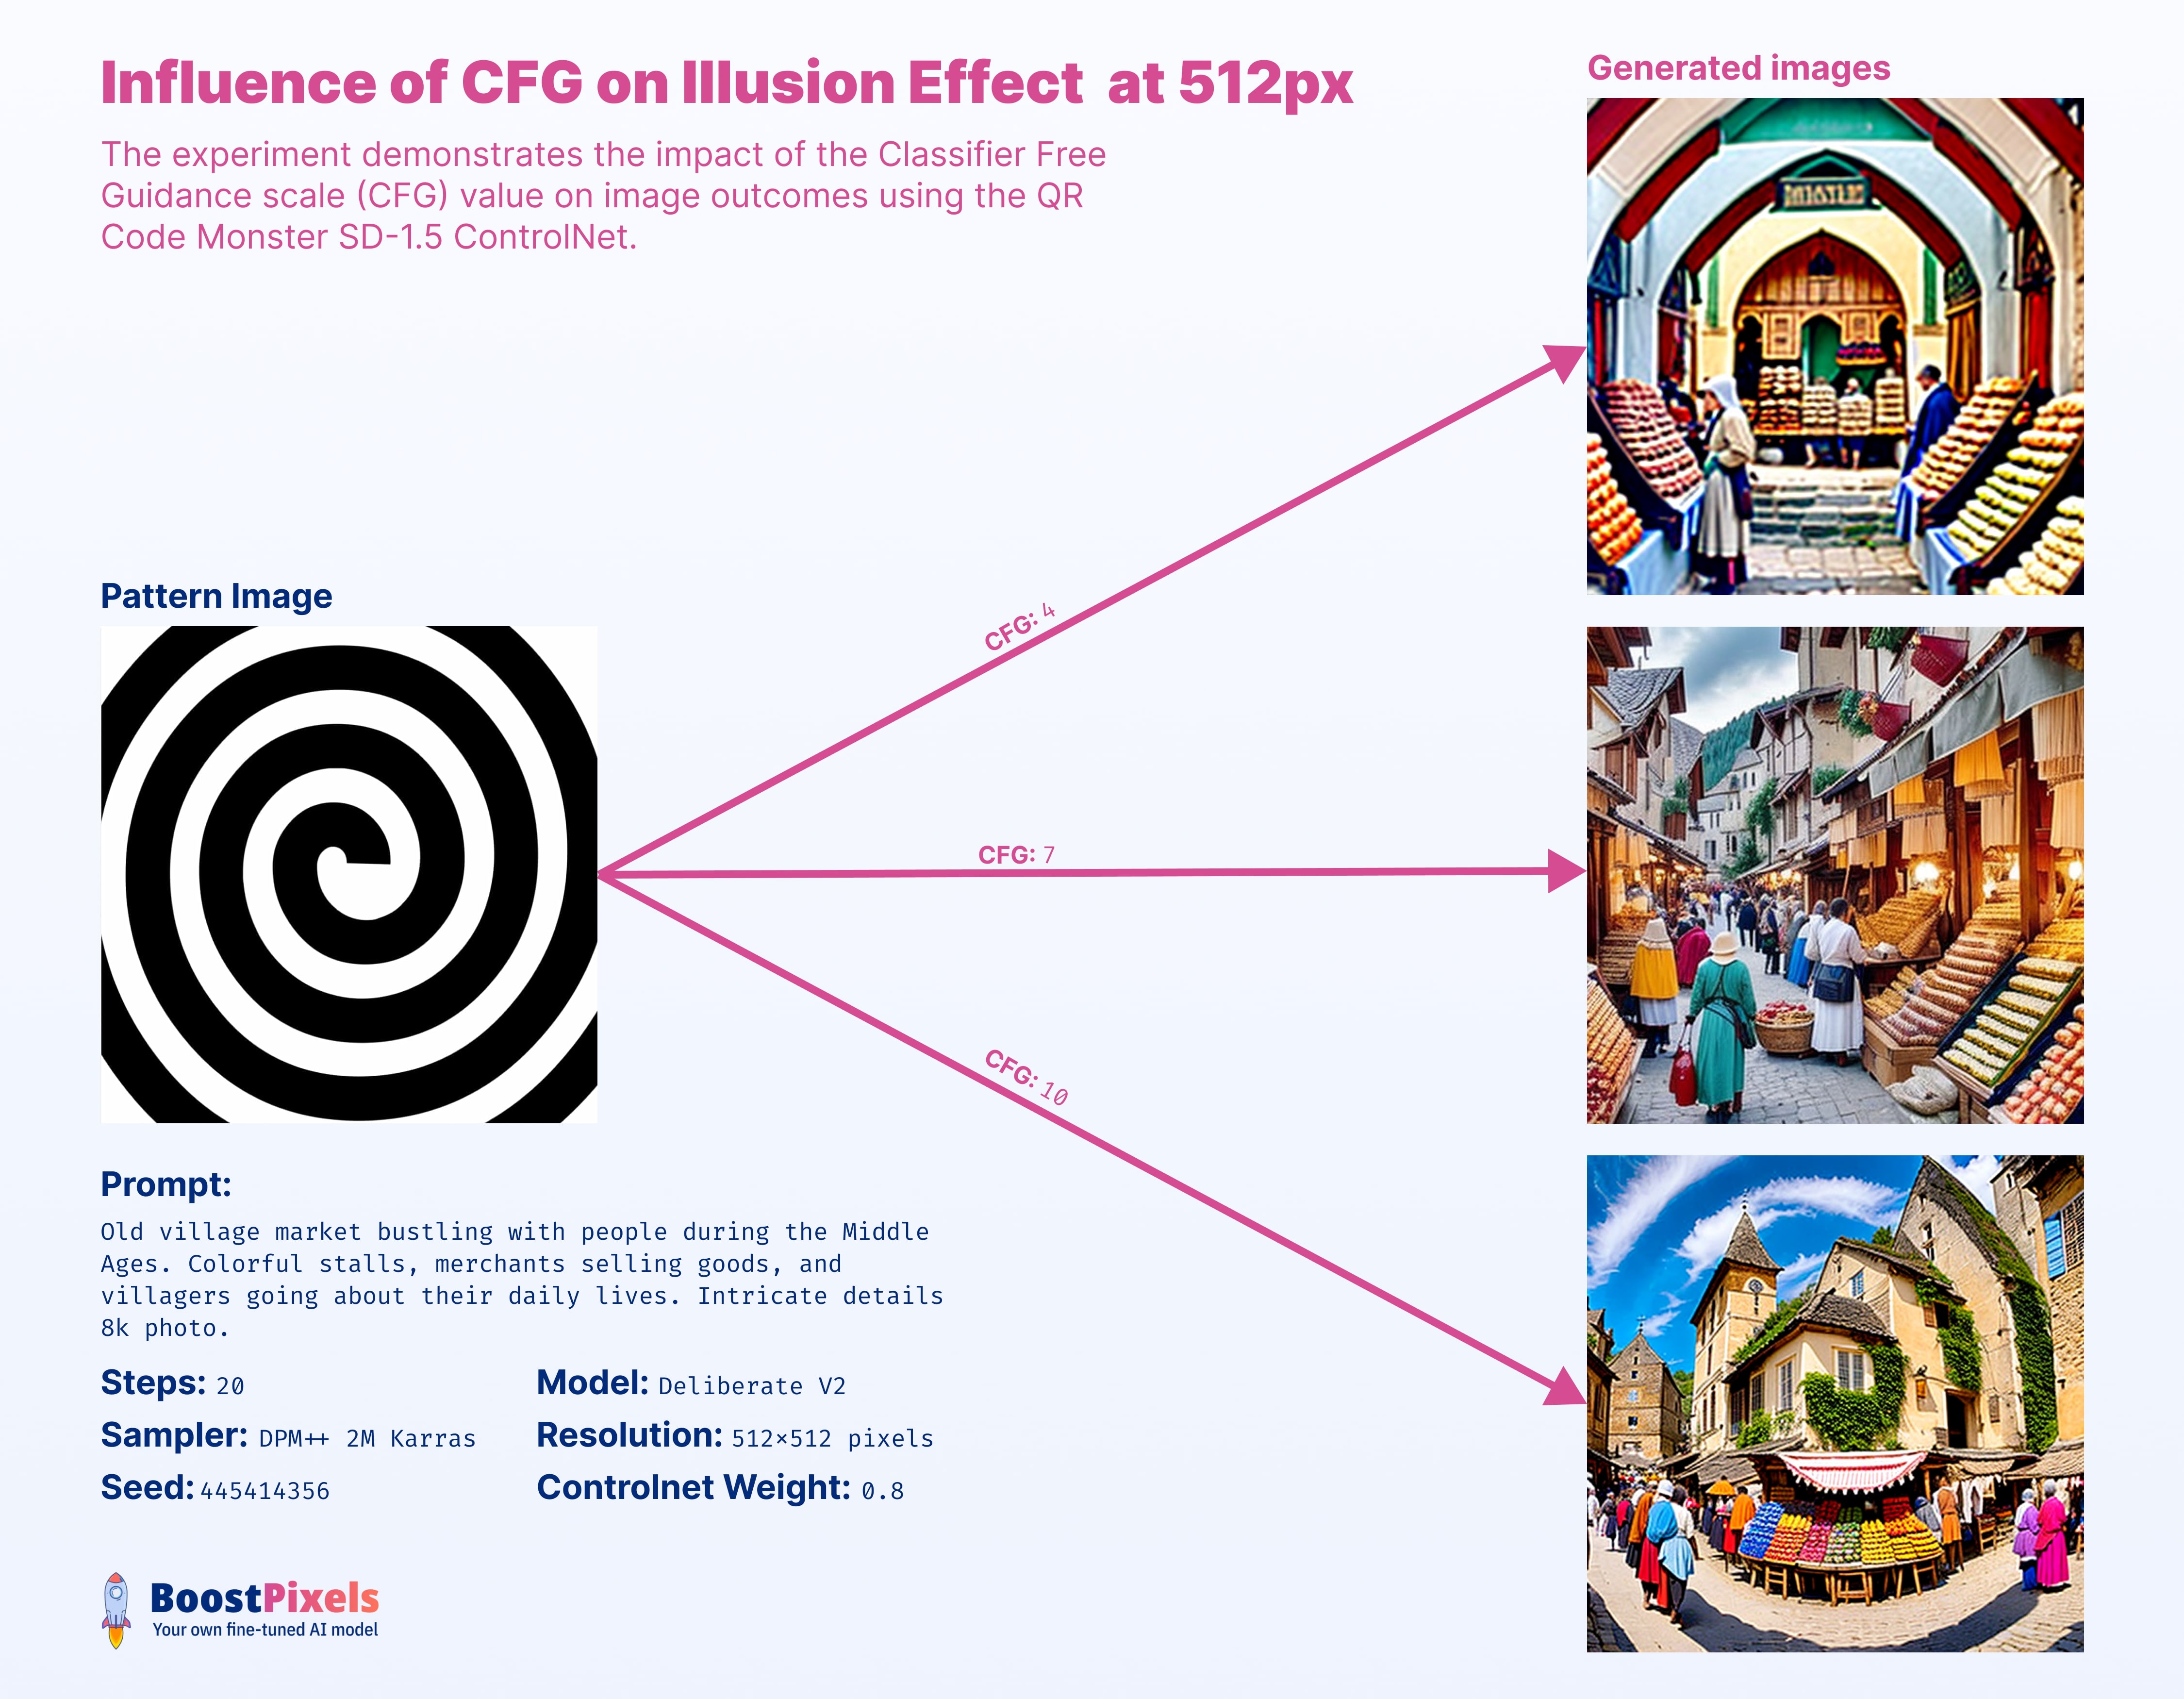
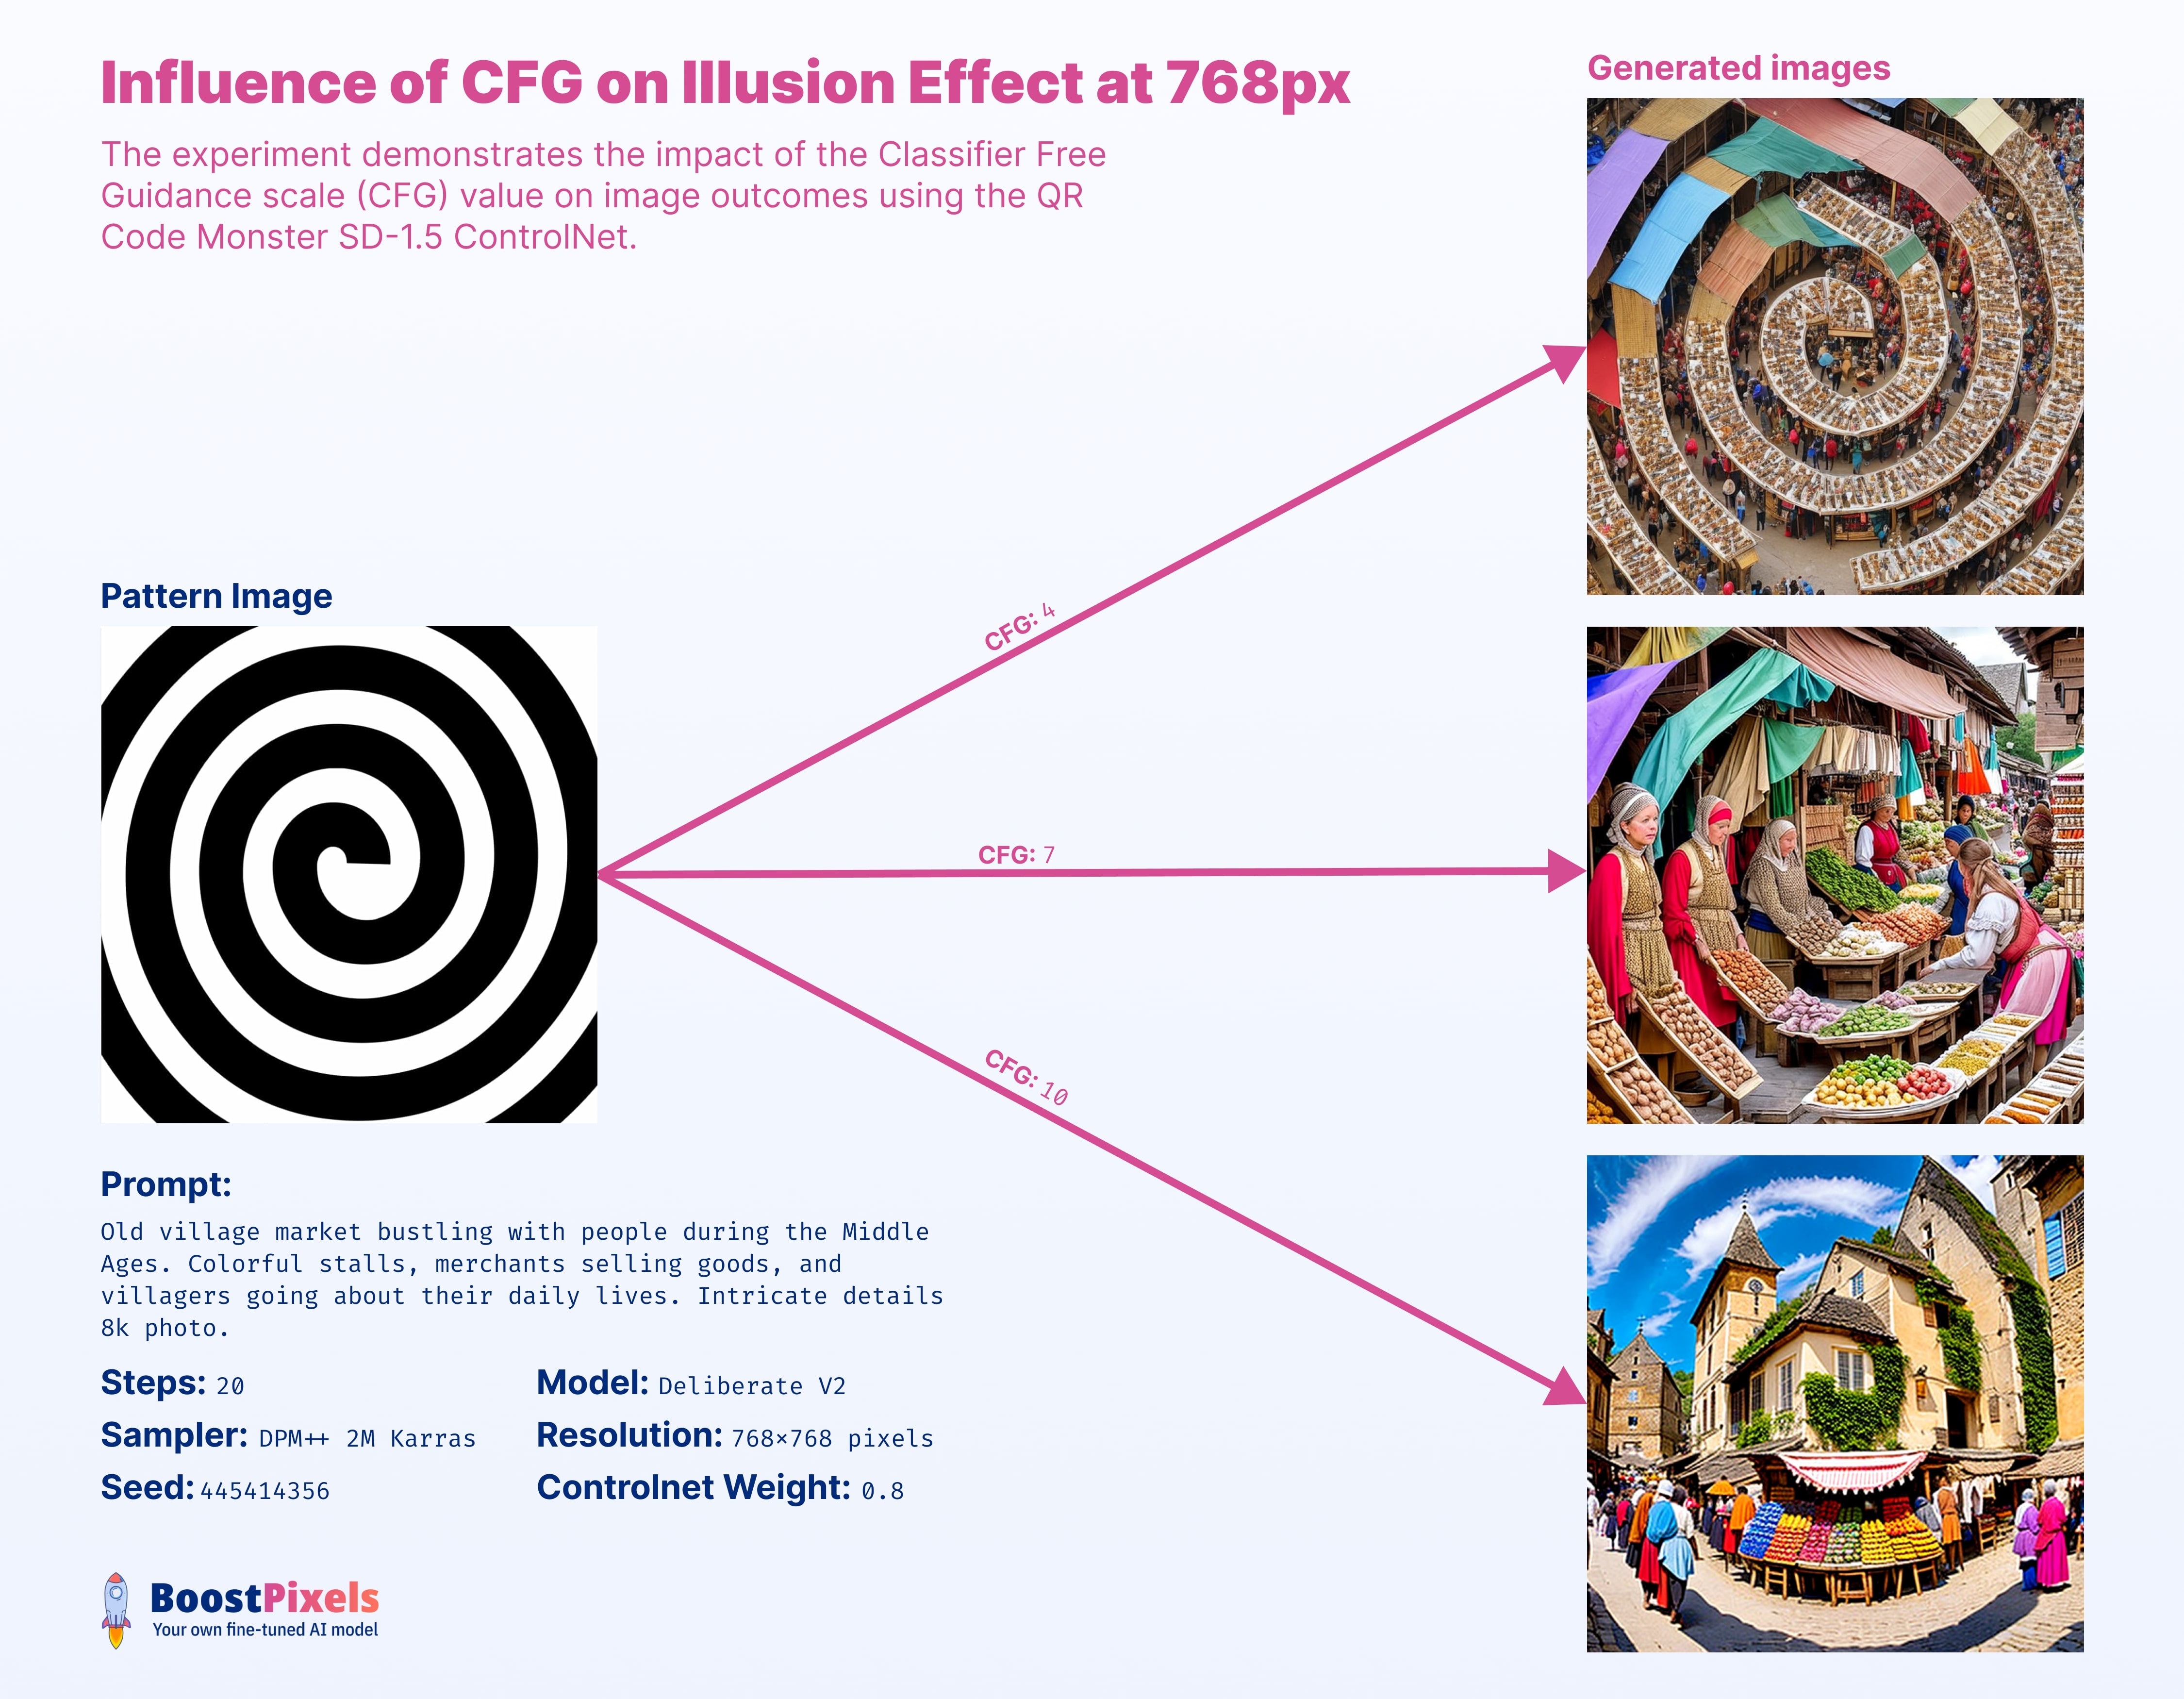
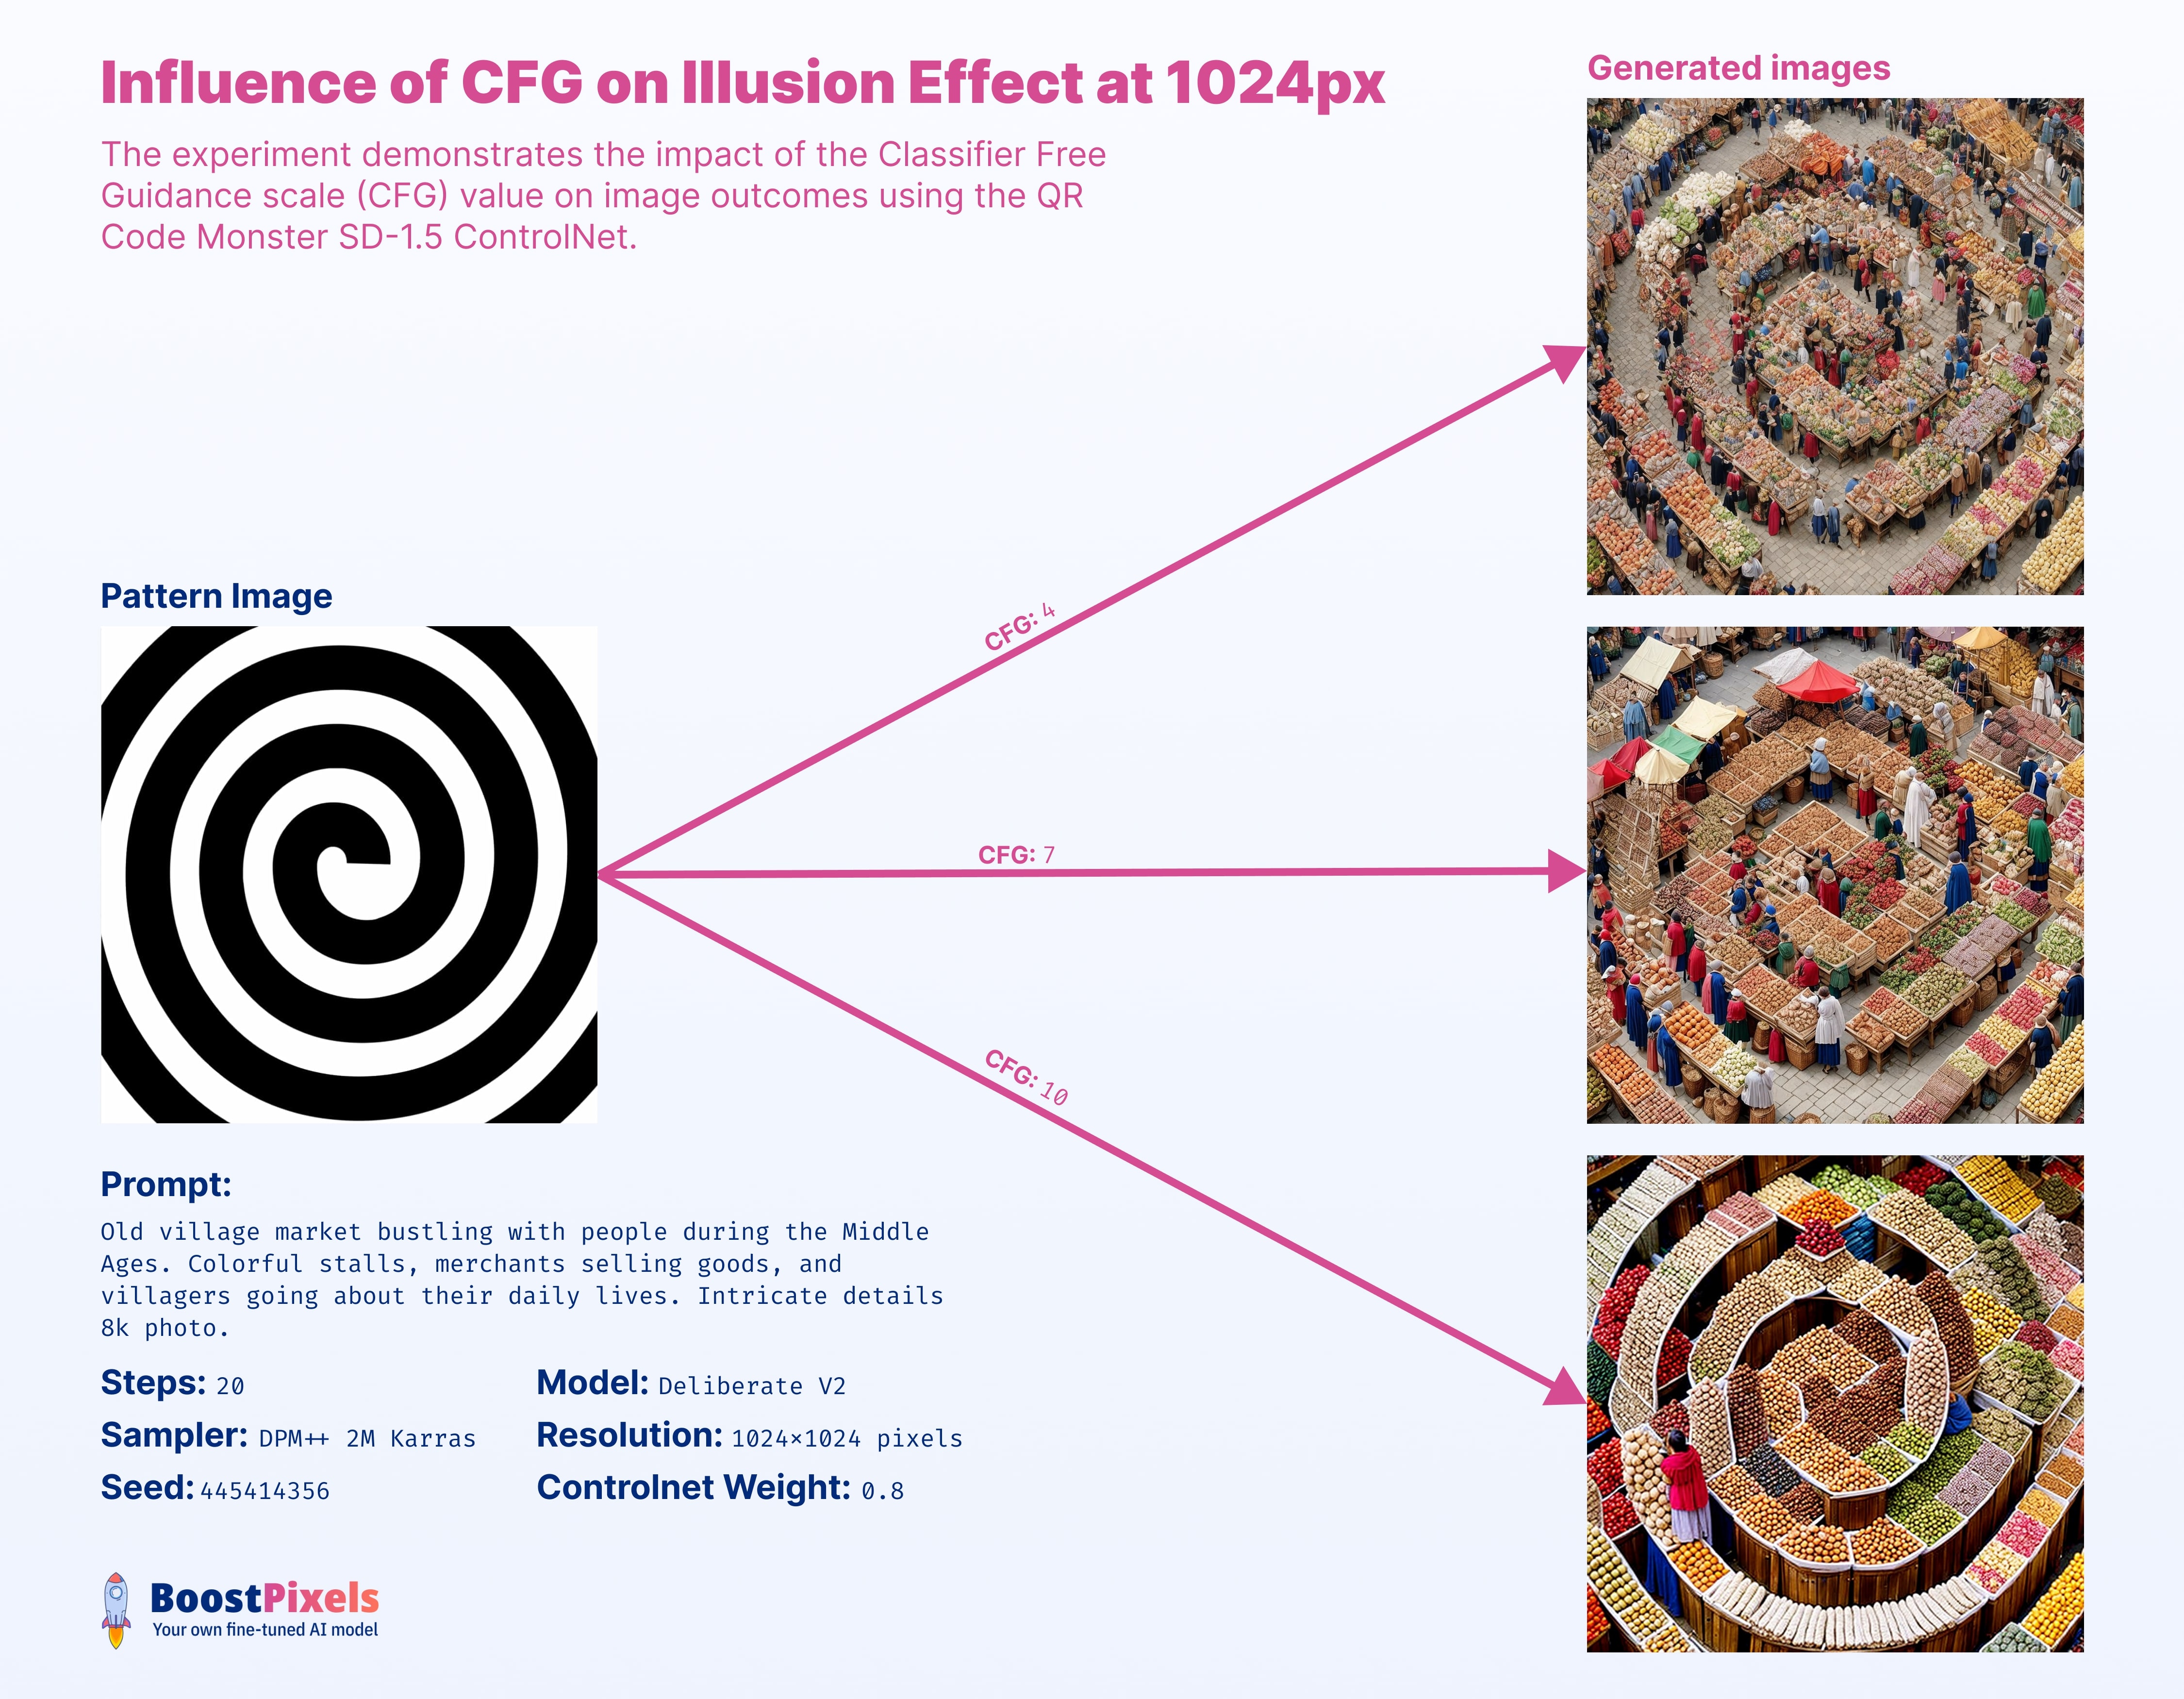
CFG
As anticipated, CFG plays a pivotal role in this effect, with its impact intertwined with resolution. While the examples suggest 7 as an optimal value, the ideal setting hinges on a synergy of various parameters and the overarching artistic objective.
(For those new to Stable Diffusion: CFG value determines how closely the generated image adheres to the input prompt. Too low, and the image deviates from guidance. Too high, it's overly constrained and may lack creativity, particularly when paired with the desired spiral illusion.
CFG has a nuanced interplay with other parameters. High weight tokens strongly influence image output. Adjusting CFG with these can amplify their effect. Increased CFG amplifies low weight prompts, while too low a CFG may render them nearly invisible in the final image.)
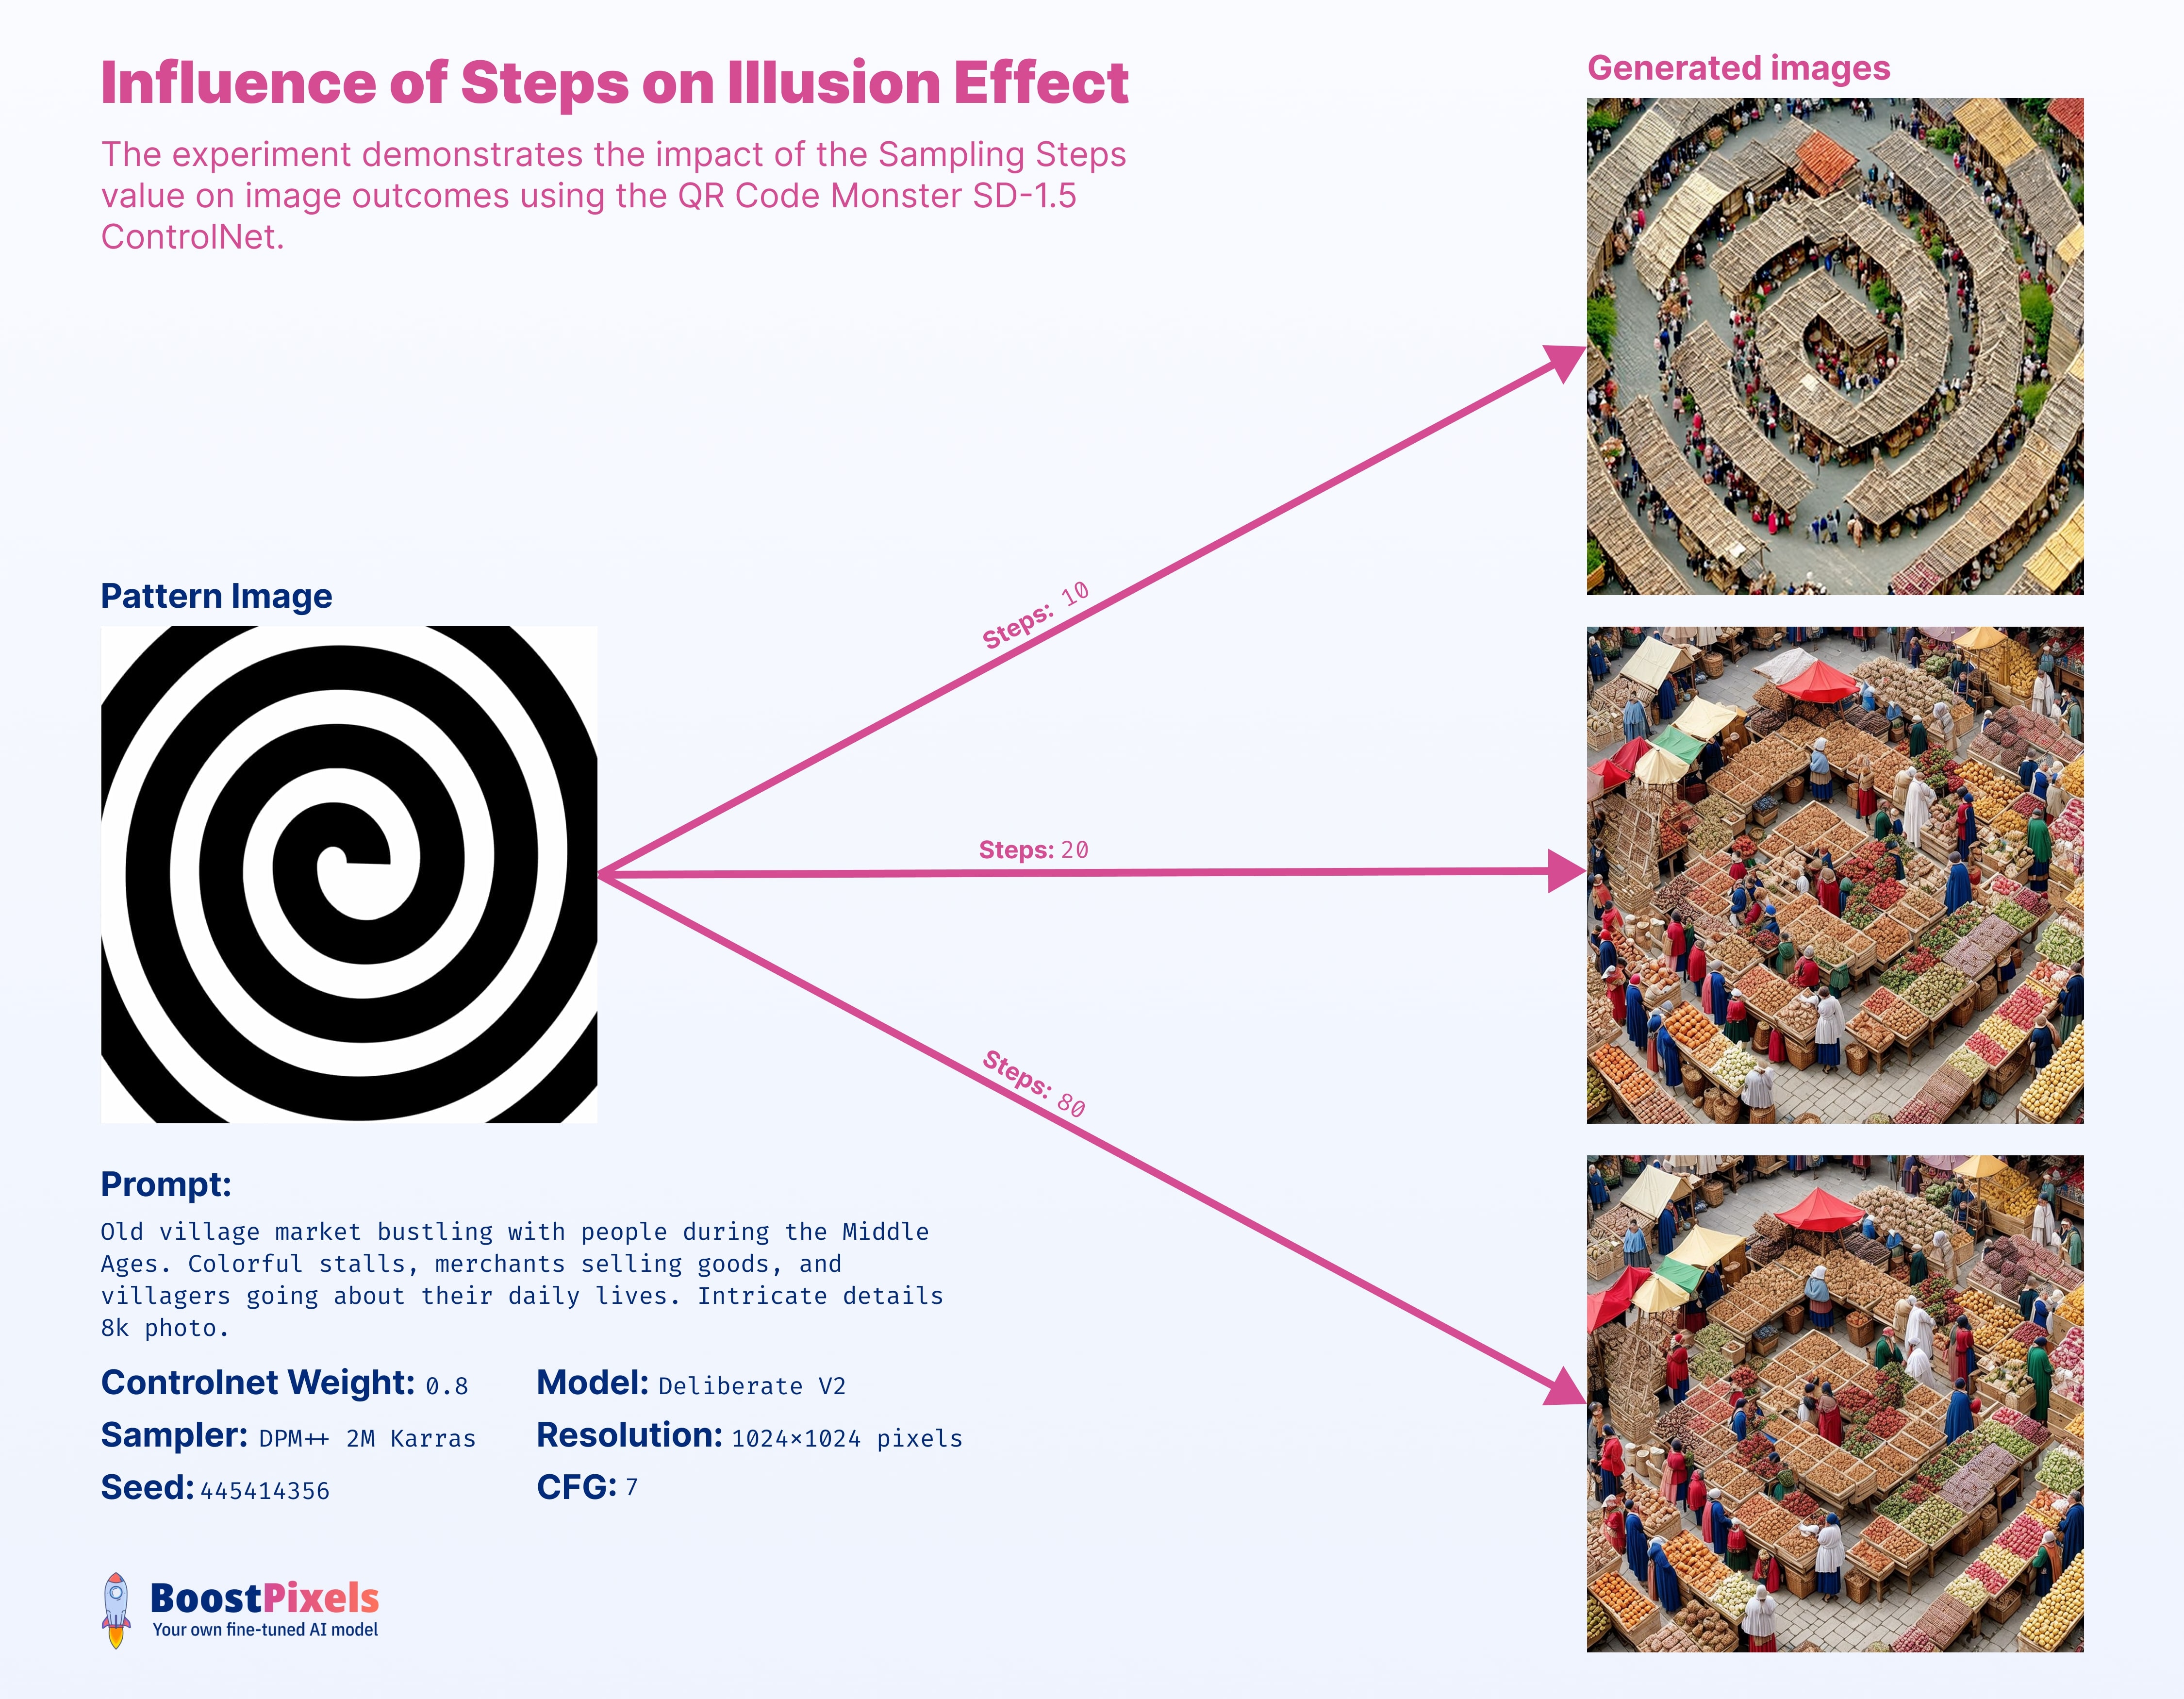
Steps
At 10 steps, the generated image is lacking finer details. Jumping to 80 steps adds significant generation time without substantial detail enhancement.
Using DPM++ 2M Karras:
10 Steps: 12s20 Steps: 16s80 Steps: 47s
(For those new to Stable Diffusion: Steps determine how many times Stable Diffusion iterates to transition from noise to a clear image. More steps = usually better quality but slower and often isn't worth waiting for minor improvements.)
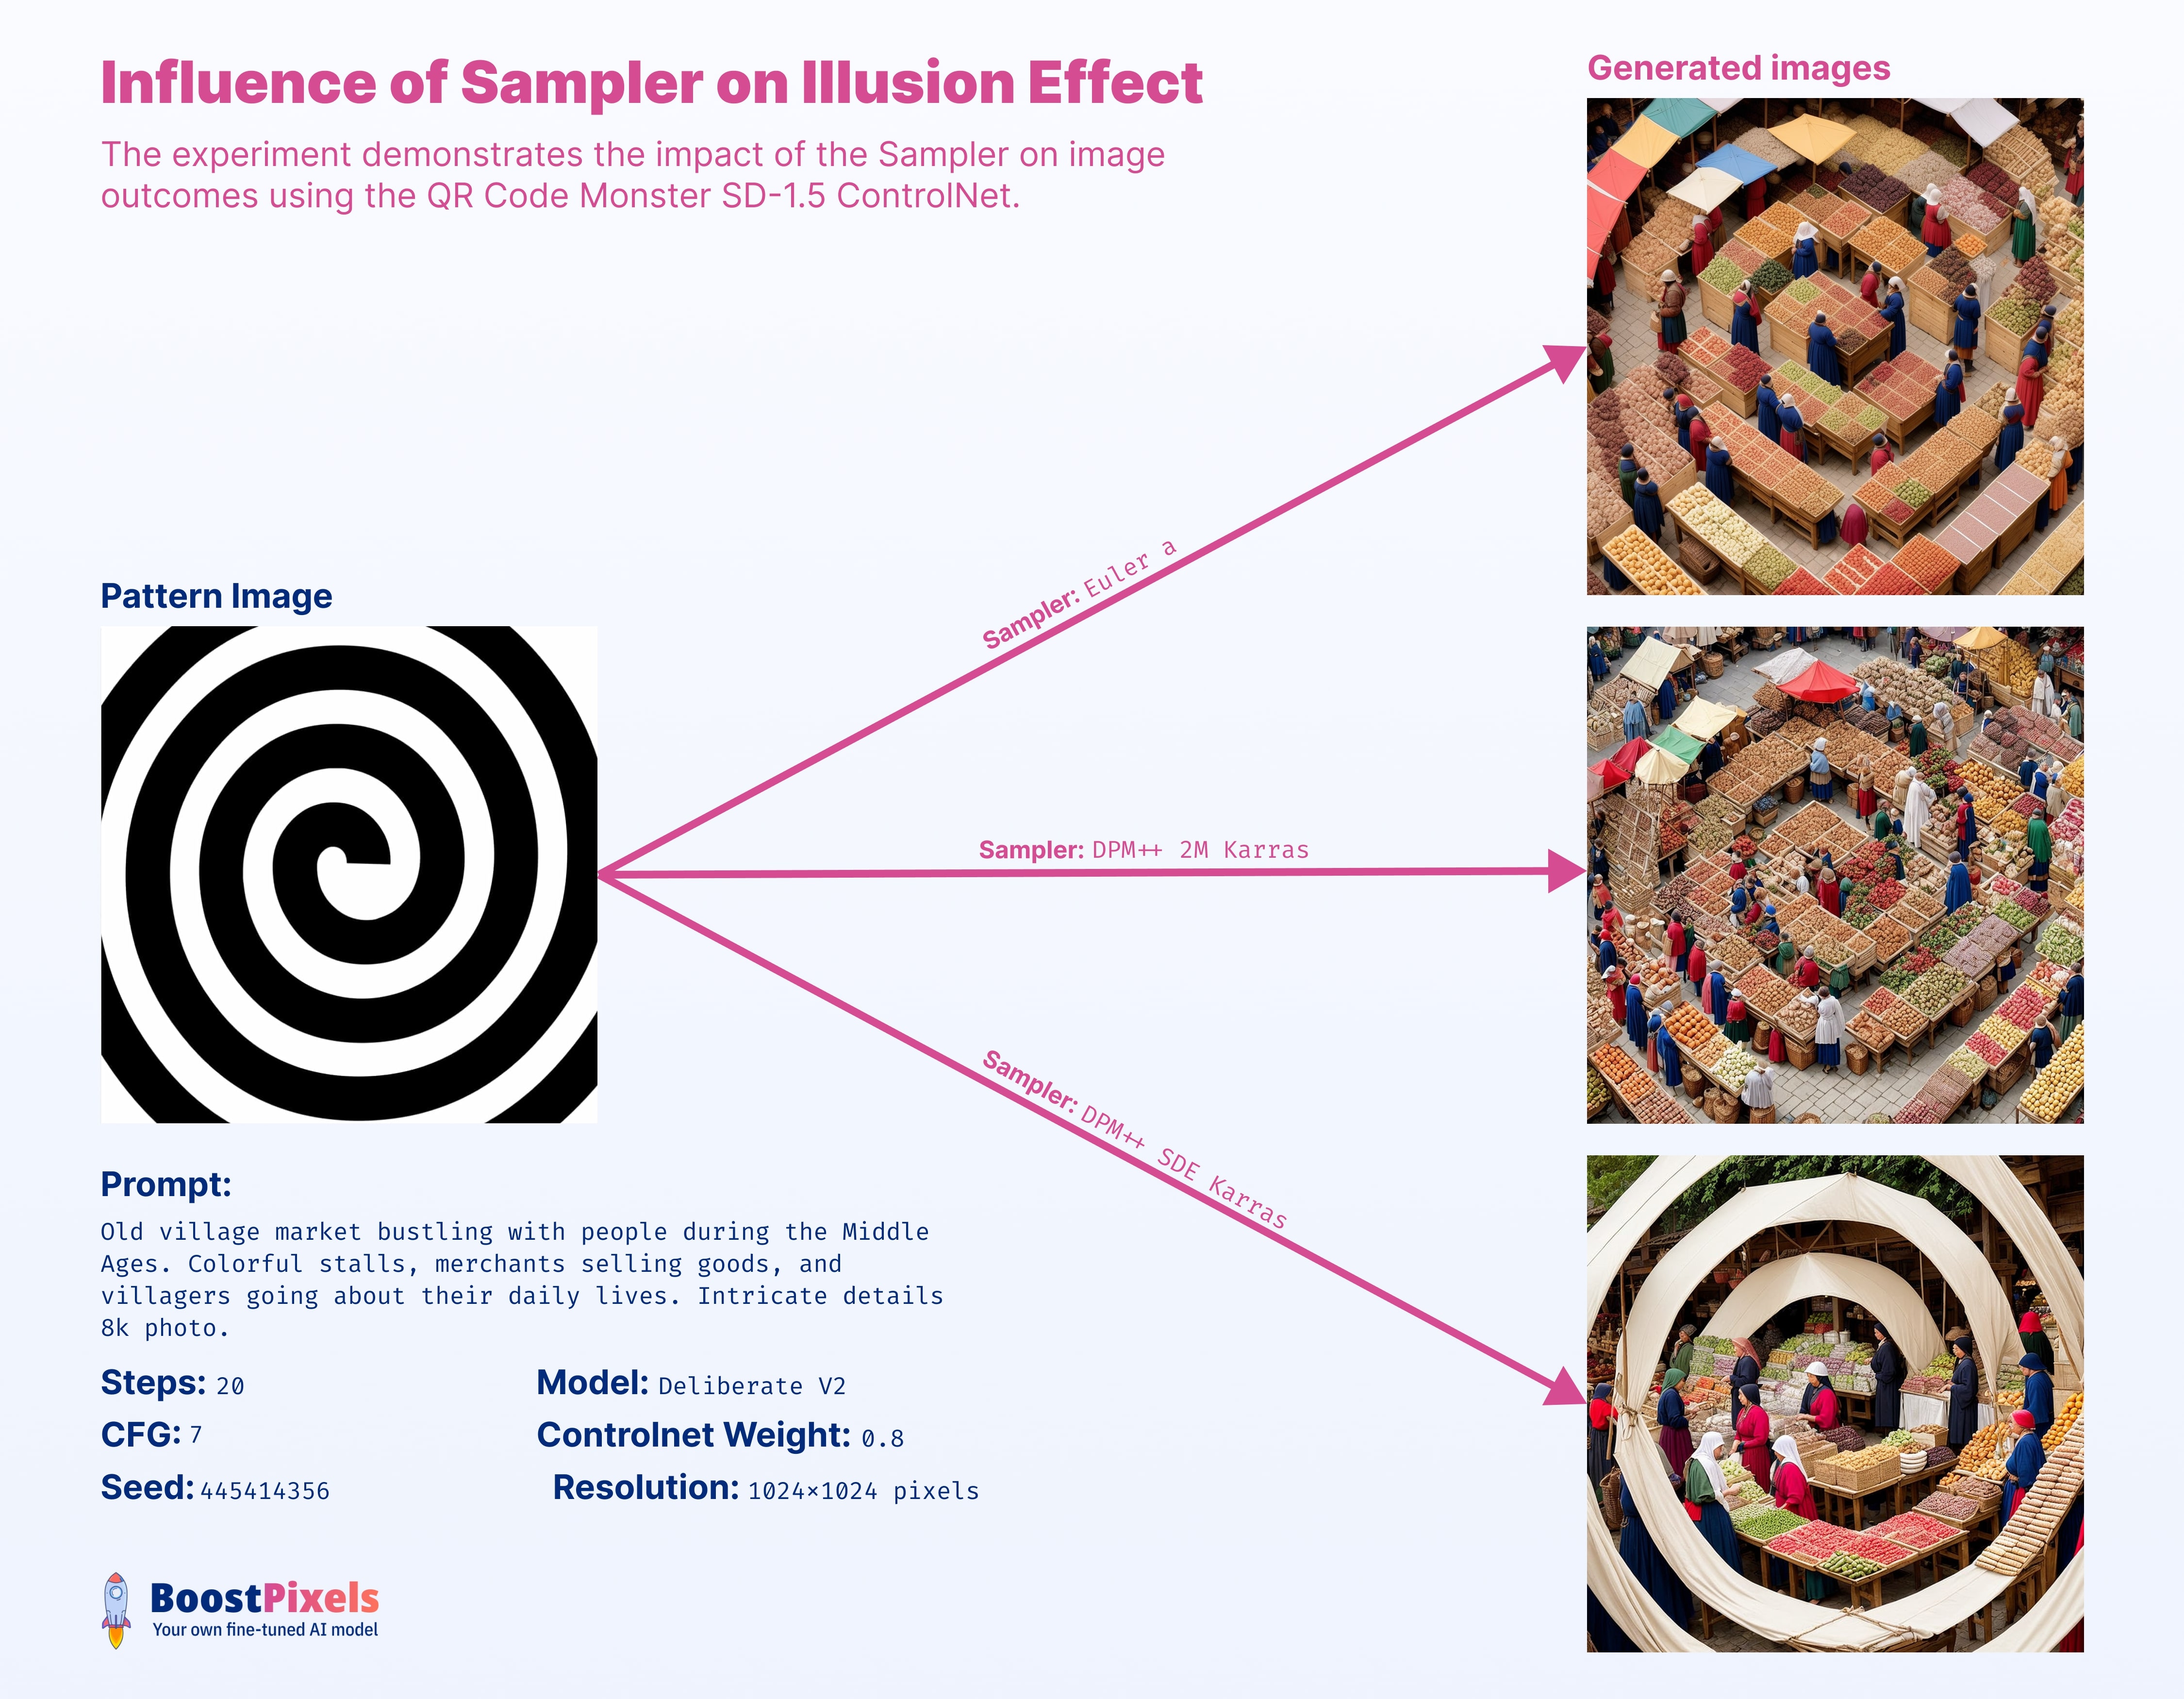
Sampler
The sampler behaves as expected, mirroring results without ControlNet. Euler results in softer yet creative images. DPM++ SDE Karras offers sharpness and detail, while DPM++ 2M Karras merges the strengths of both.
At 1024px, Euler a generates in 14 seconds, DPM++ 2M Karras in 16 seconds, and DPM++ SDE Karras in 25 seconds. However, since DPM++ SDE Karras can yield similar results in fewer steps, their generation times can be viewed as roughly equivalent.
(For those new to Stable Diffusion: Ancestral samplers operate on a nondeterministic principle. This means that even when you maintain the same seed and other parameters consistently, the sampling process introduces inherent variability. As a result, you can obtain completely different generated images in separate runs, despite identical parameters.)
Pattern
Playing with patterns is fun and versatile; they can be anything. However, there are some factors to consider: too small details are usually not visible in the generated image. Black regions in the pattern often translate to darker areas in the generated image. Exploring grey (gamma) patterns, introducing noise grain for smoother transitions can yield compelling results. It also works perfectly with text images.
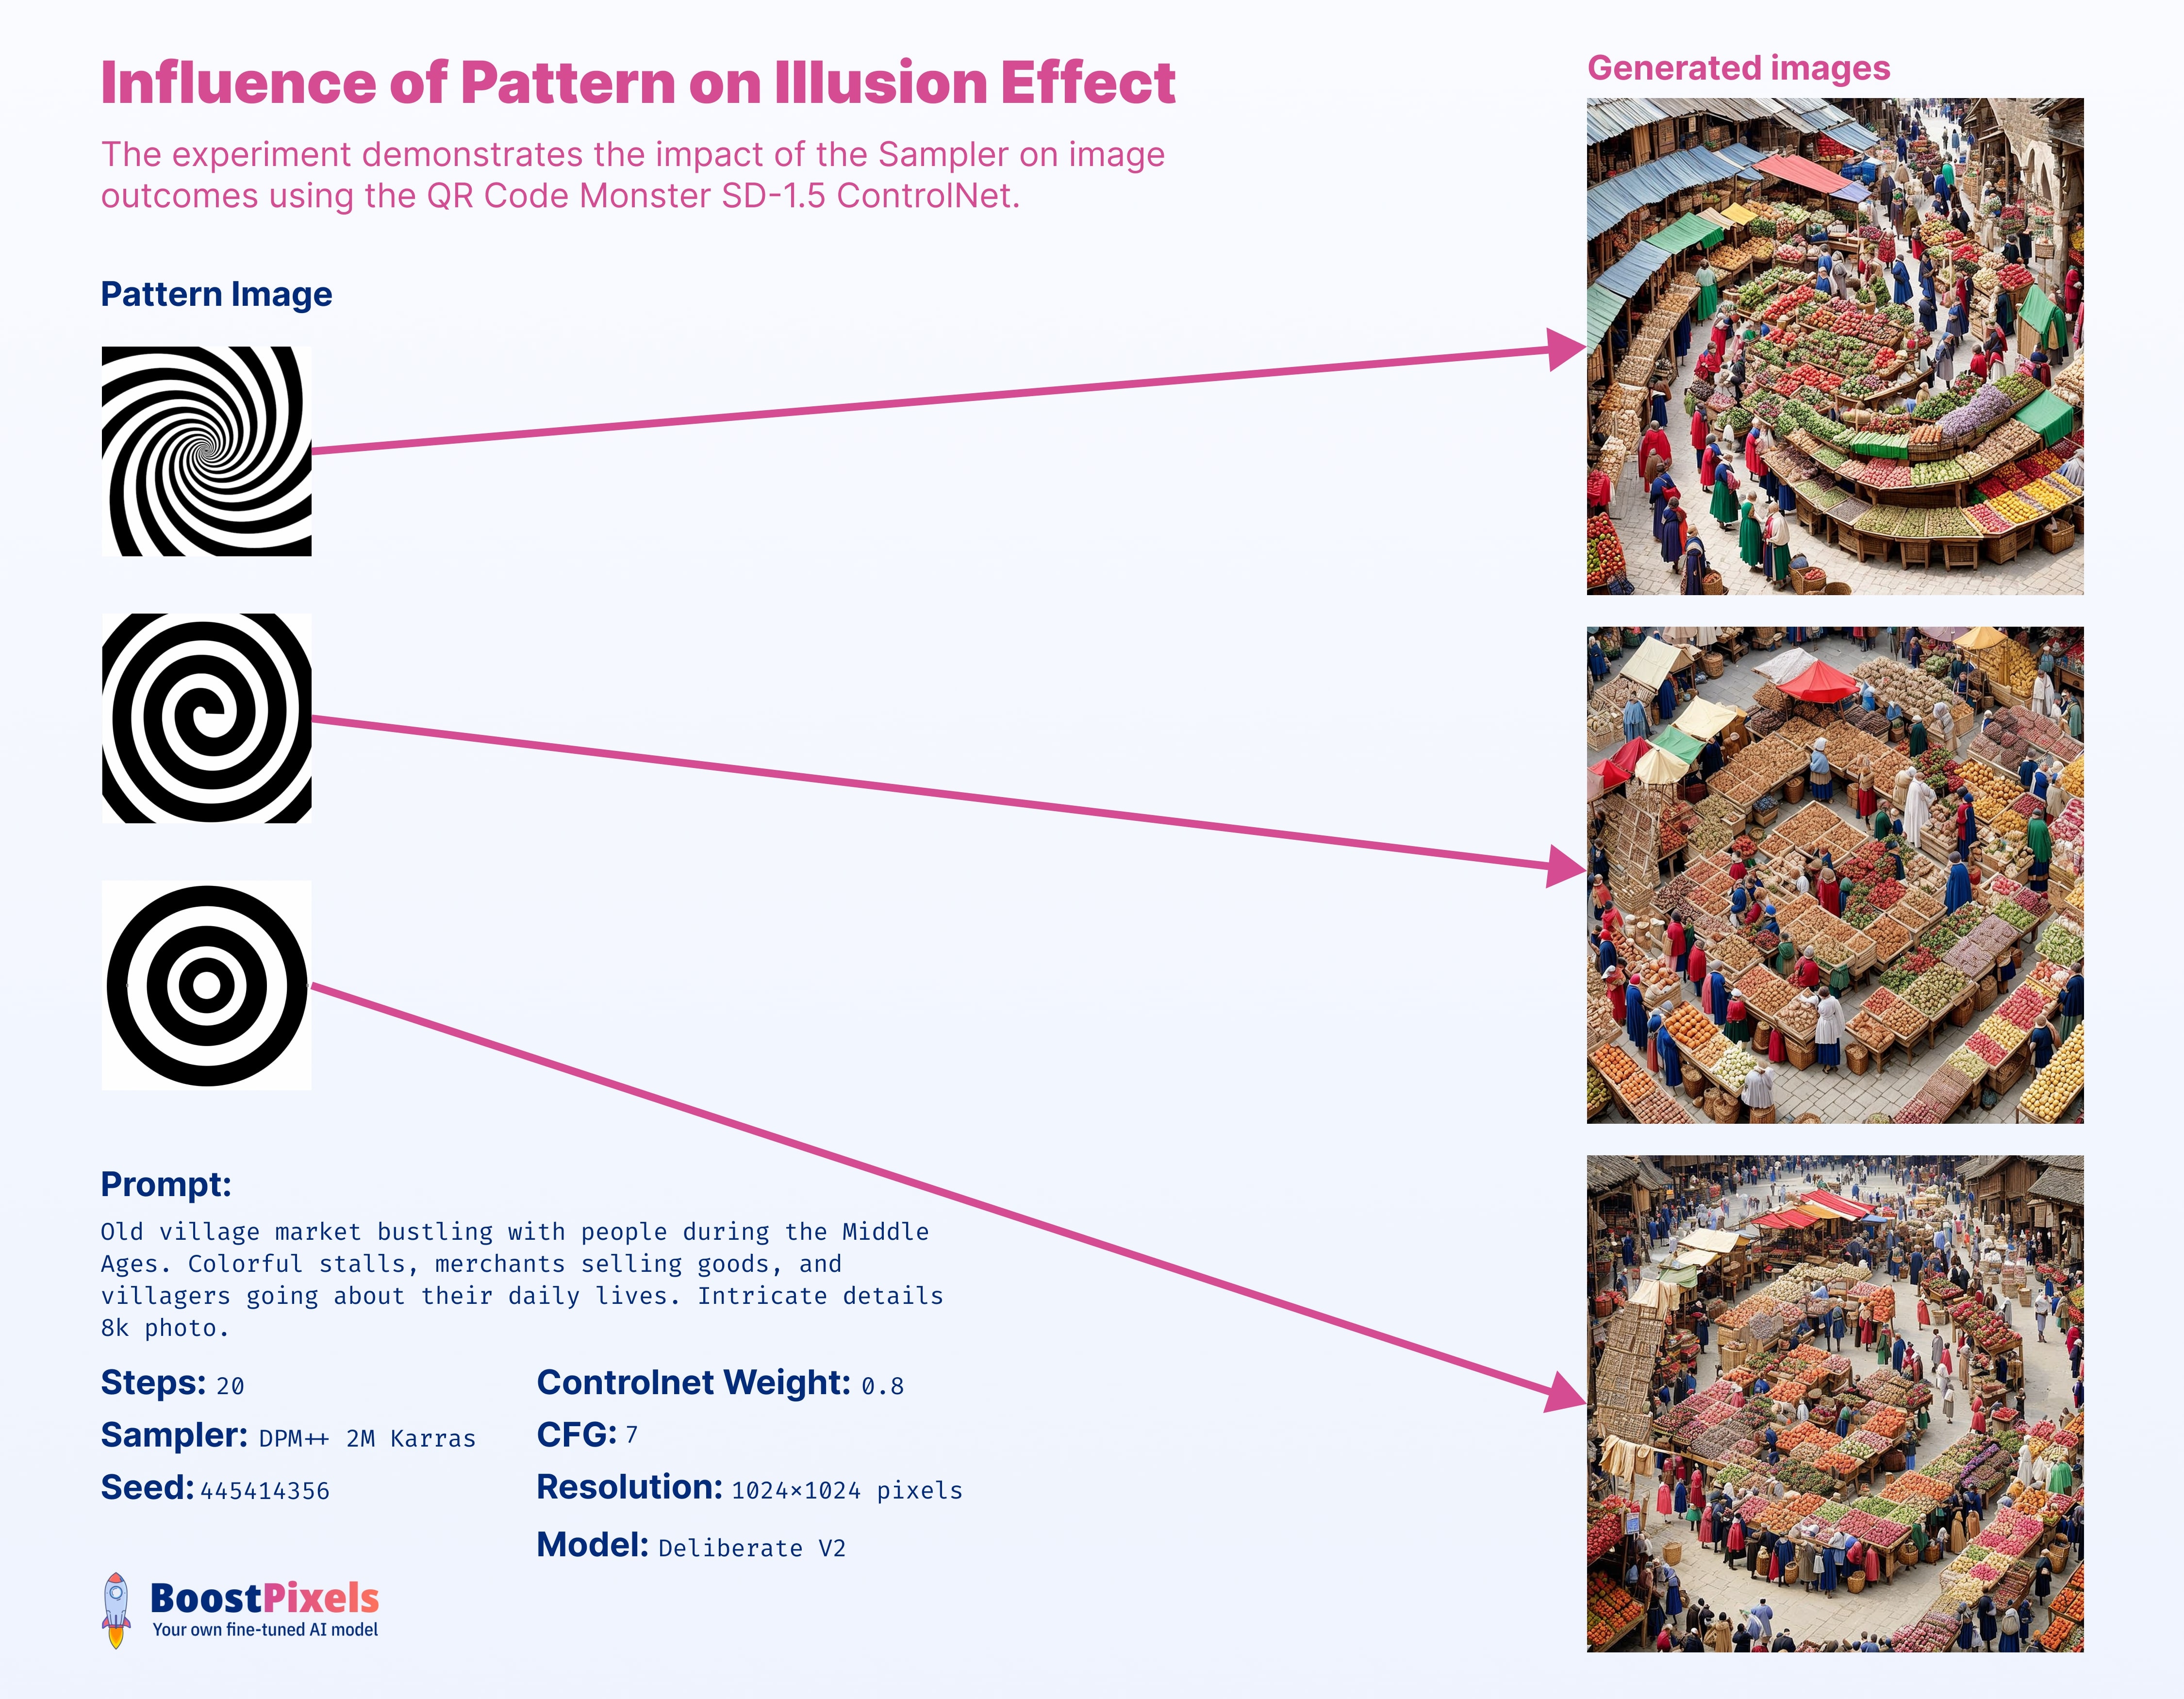
Creating a visual illusion through a pattern is mostly art, imagination and creativity. In the next few months, I believe we'll see many different and surprising creations. These will show us new things and how creative people can be.
- Solid Areas: The QR Monster ControlNet model expects patterns with solid areas. It's not about the outlines, but the entirety of the shape being filled in that matters.
- No fine small details: The QR Monster ControlNet model struggles with fine details due to the challenge of fitting precise pixels into a coherent image that matches the prompt. Instead, it favors patterns with large, filled-in areas.
- Size and Distinctiveness: Bigger and more distinct areas in the pattern lead to more predictable and recognizable results. They serve as clearer "guides" for the model during image generation.
- Understanding of Luminance: The model responds to different levels of brightness. While it recognizes both black and white, it also understands various shades of grey. However, it doesn't discern different colors.
- Incorporating Noise: Introducing noise into your pattern can be beneficial. It aids in blending the pattern into the overall image, creating more intricate details around the main design. However, the extent of noise to be added should be determined based on the desired final visual.
- File Format and Size: When it comes to the file format, both png and jpg work well. But, to ensure the highest fidelity and avoid unwanted distortions, it's best to match the pattern image size with the size of the final image you intend to generate.
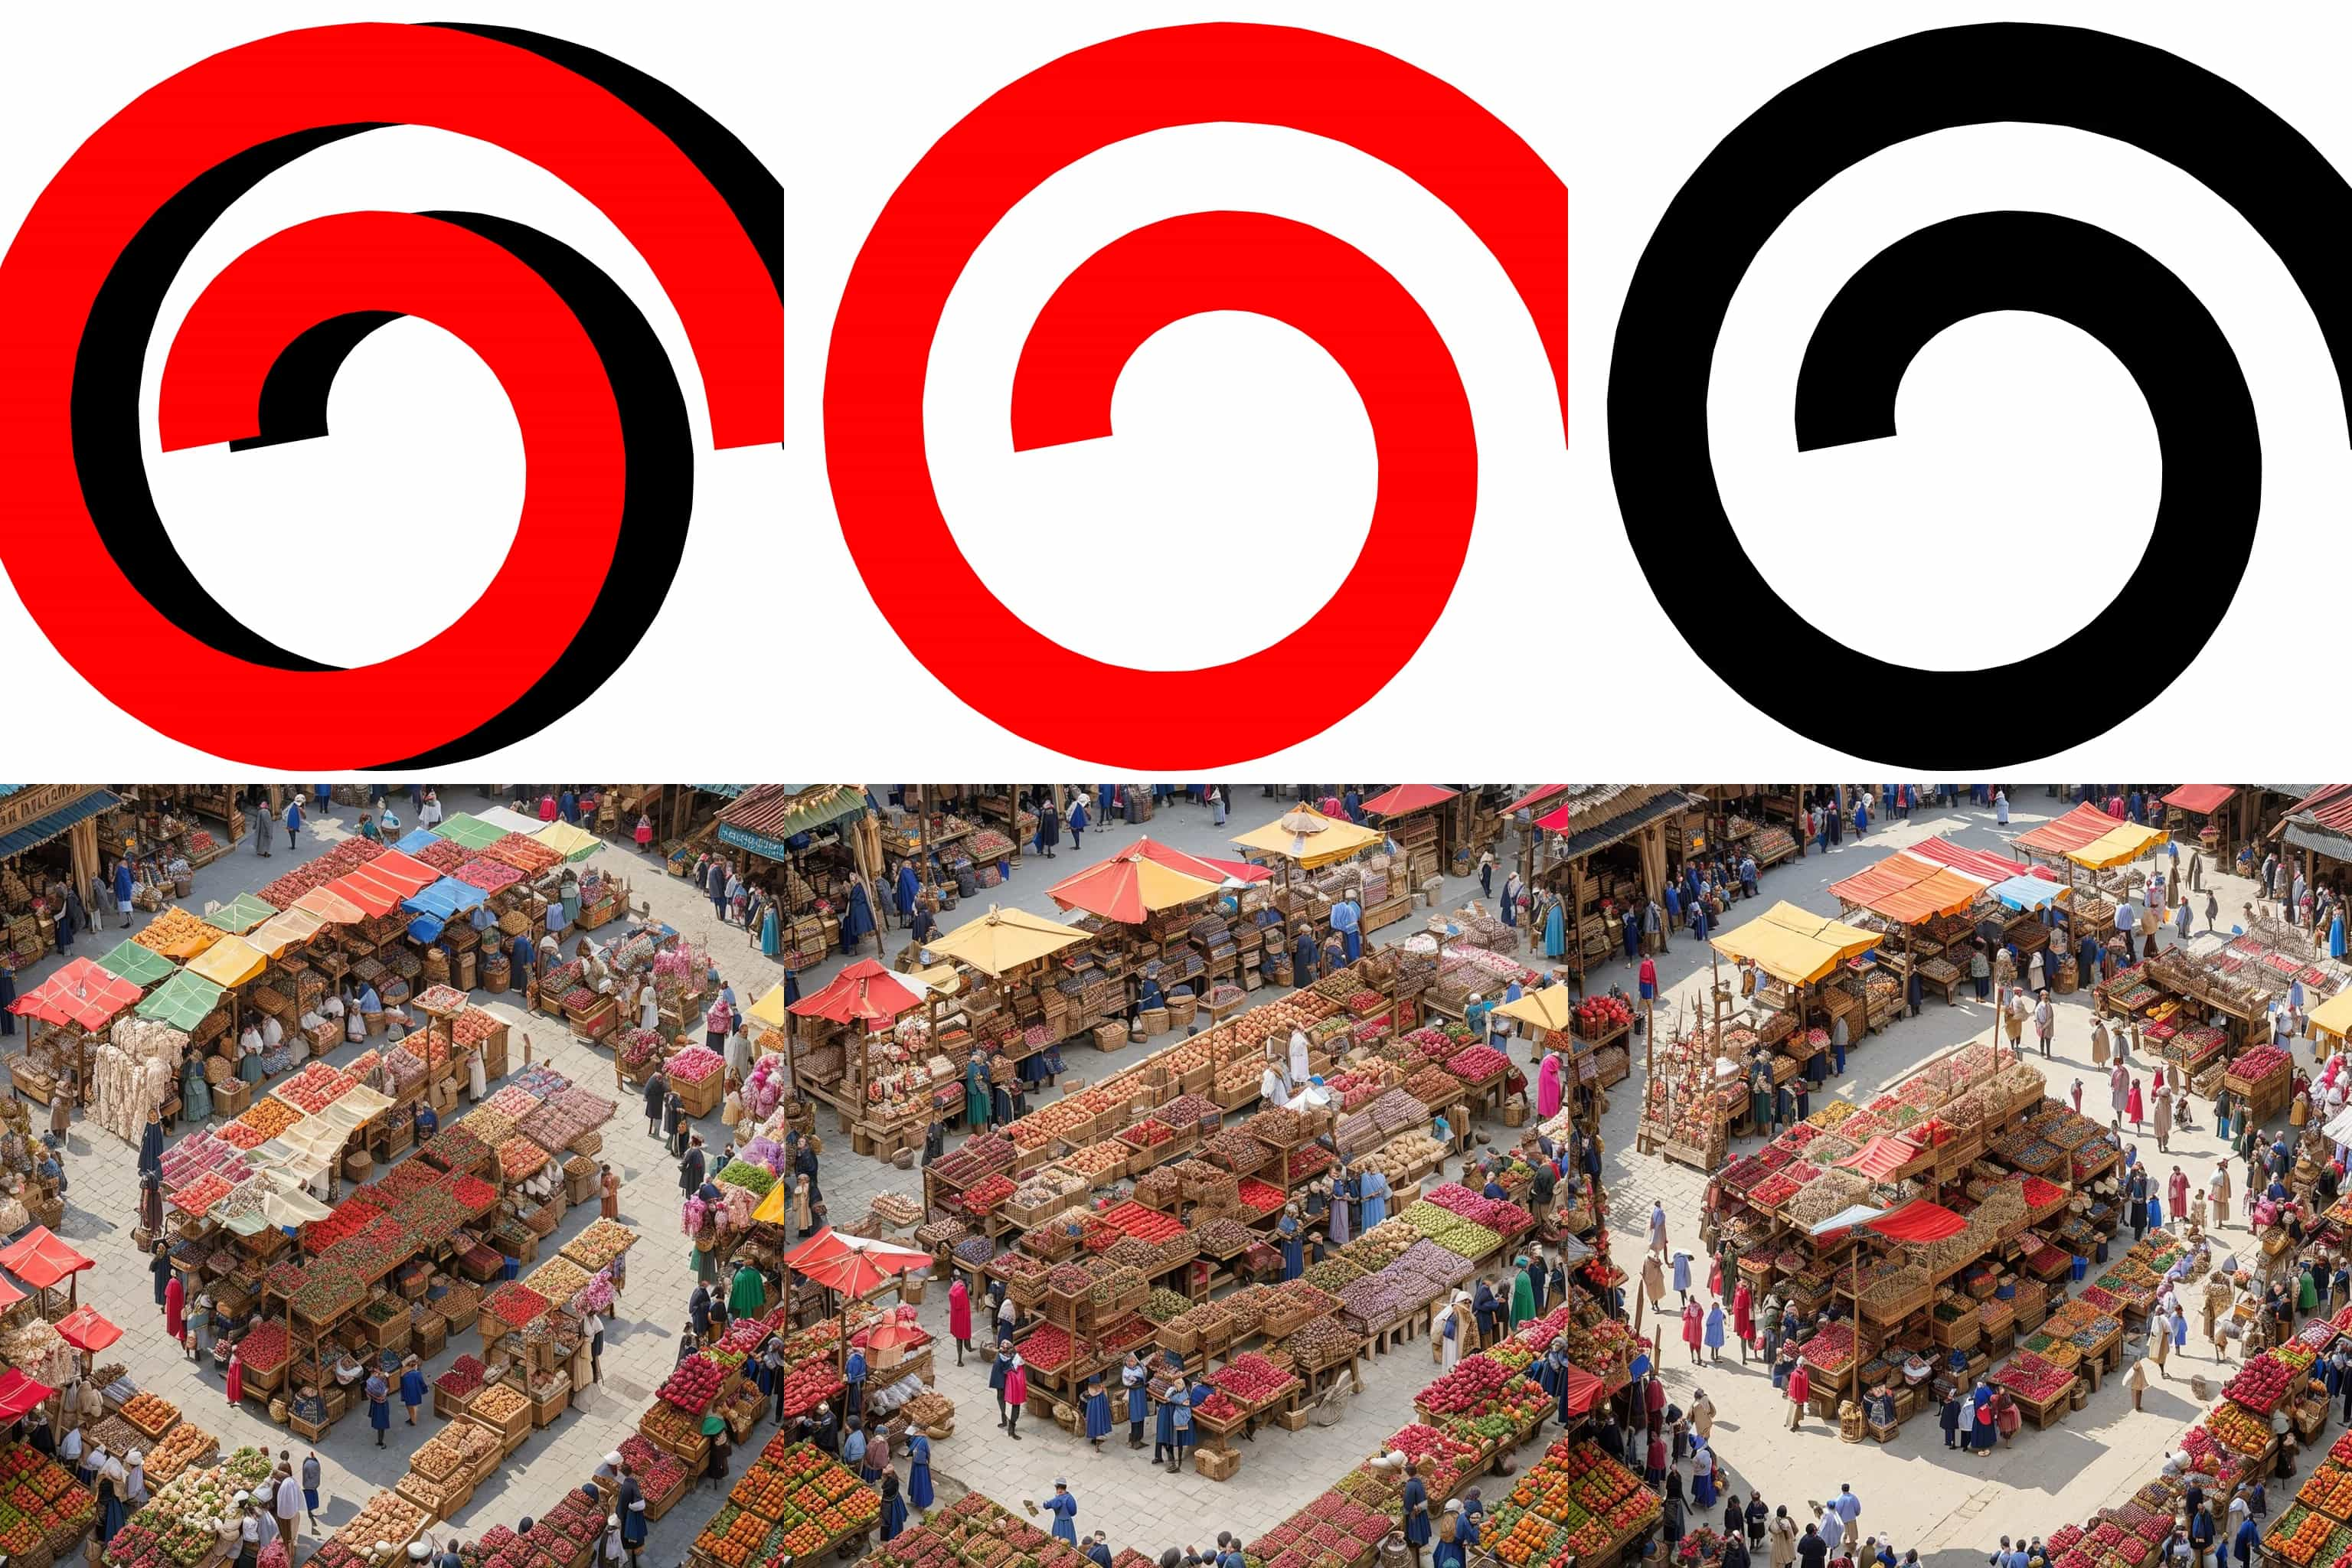
In pattern creation, it's not the color but its luminance (brightness), that's key. Even if colors get converted, their brightness remains impactful. By choosing colors or grey tones based on their luminance, you can achieve unique creative effects.
The subtle addition of random RGB noise seamlessly melds the entire image, enhancing the illusion's subtlety.

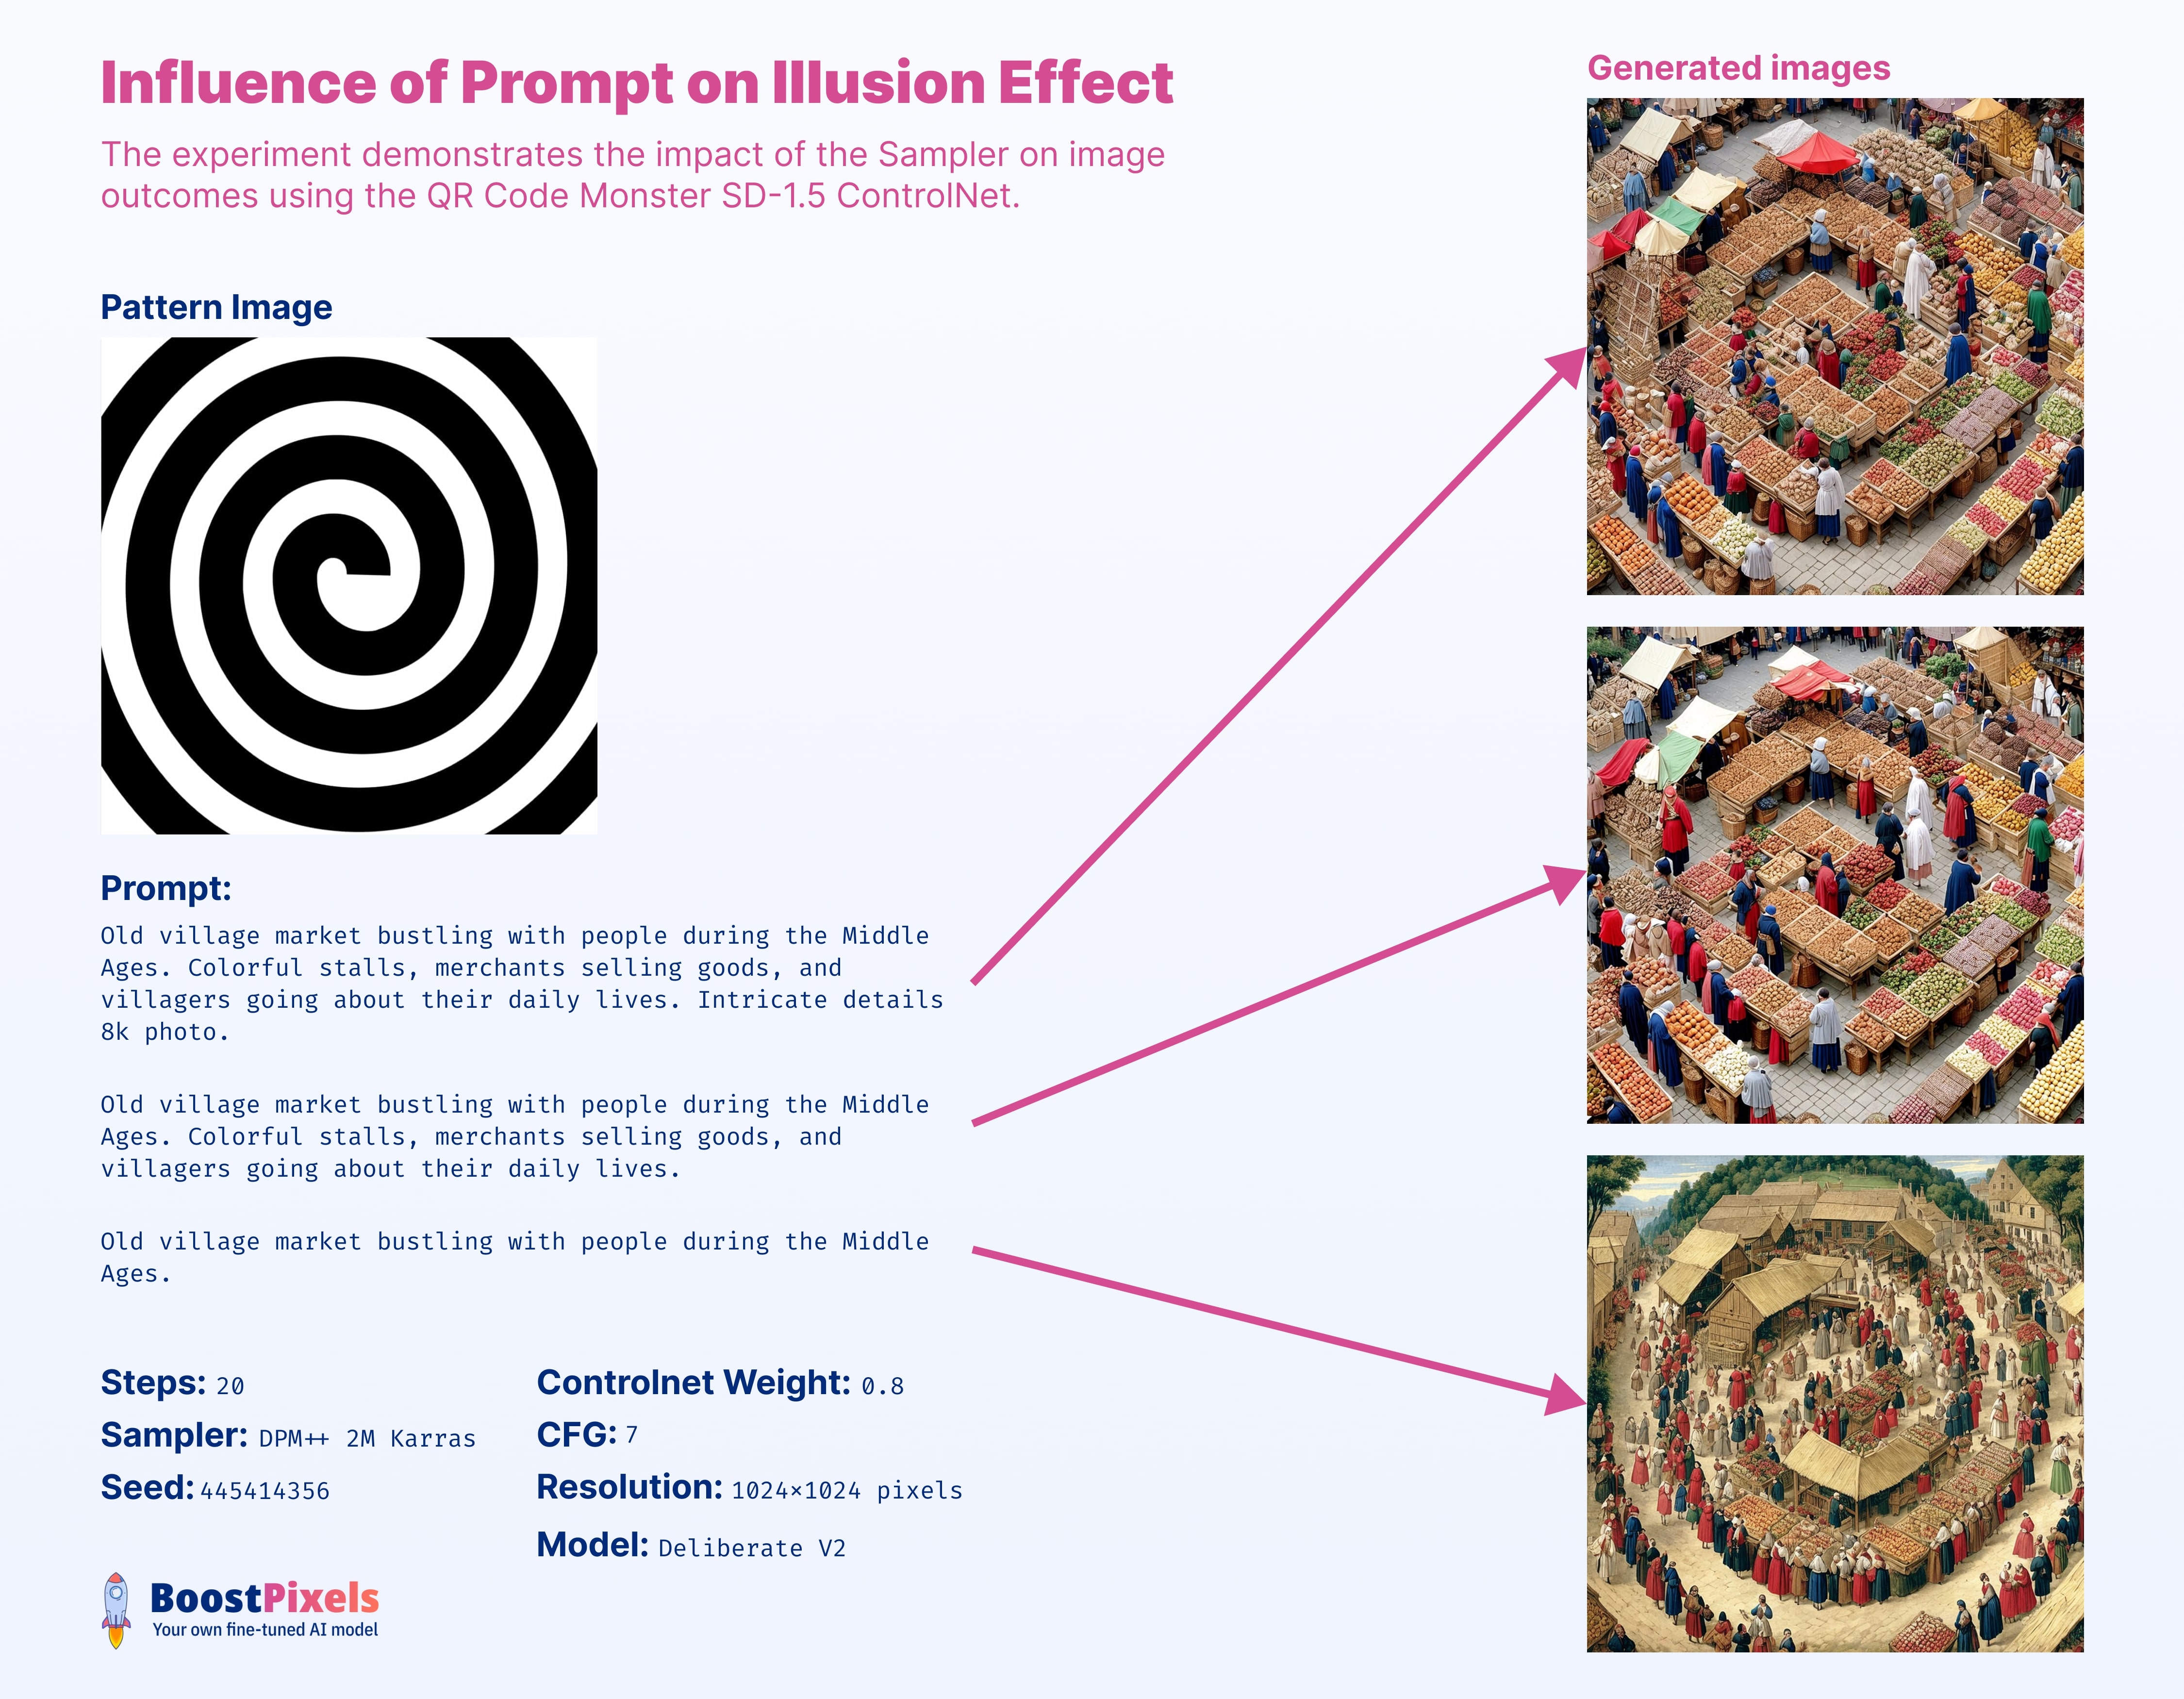
Prompt
Prompts are versatile, and it's up to your creative vision. That's the fun of text-to-image! A tip: shorter prompts give the model more latitude in the latent space, allowing it to align better with the ControlNet pattern.
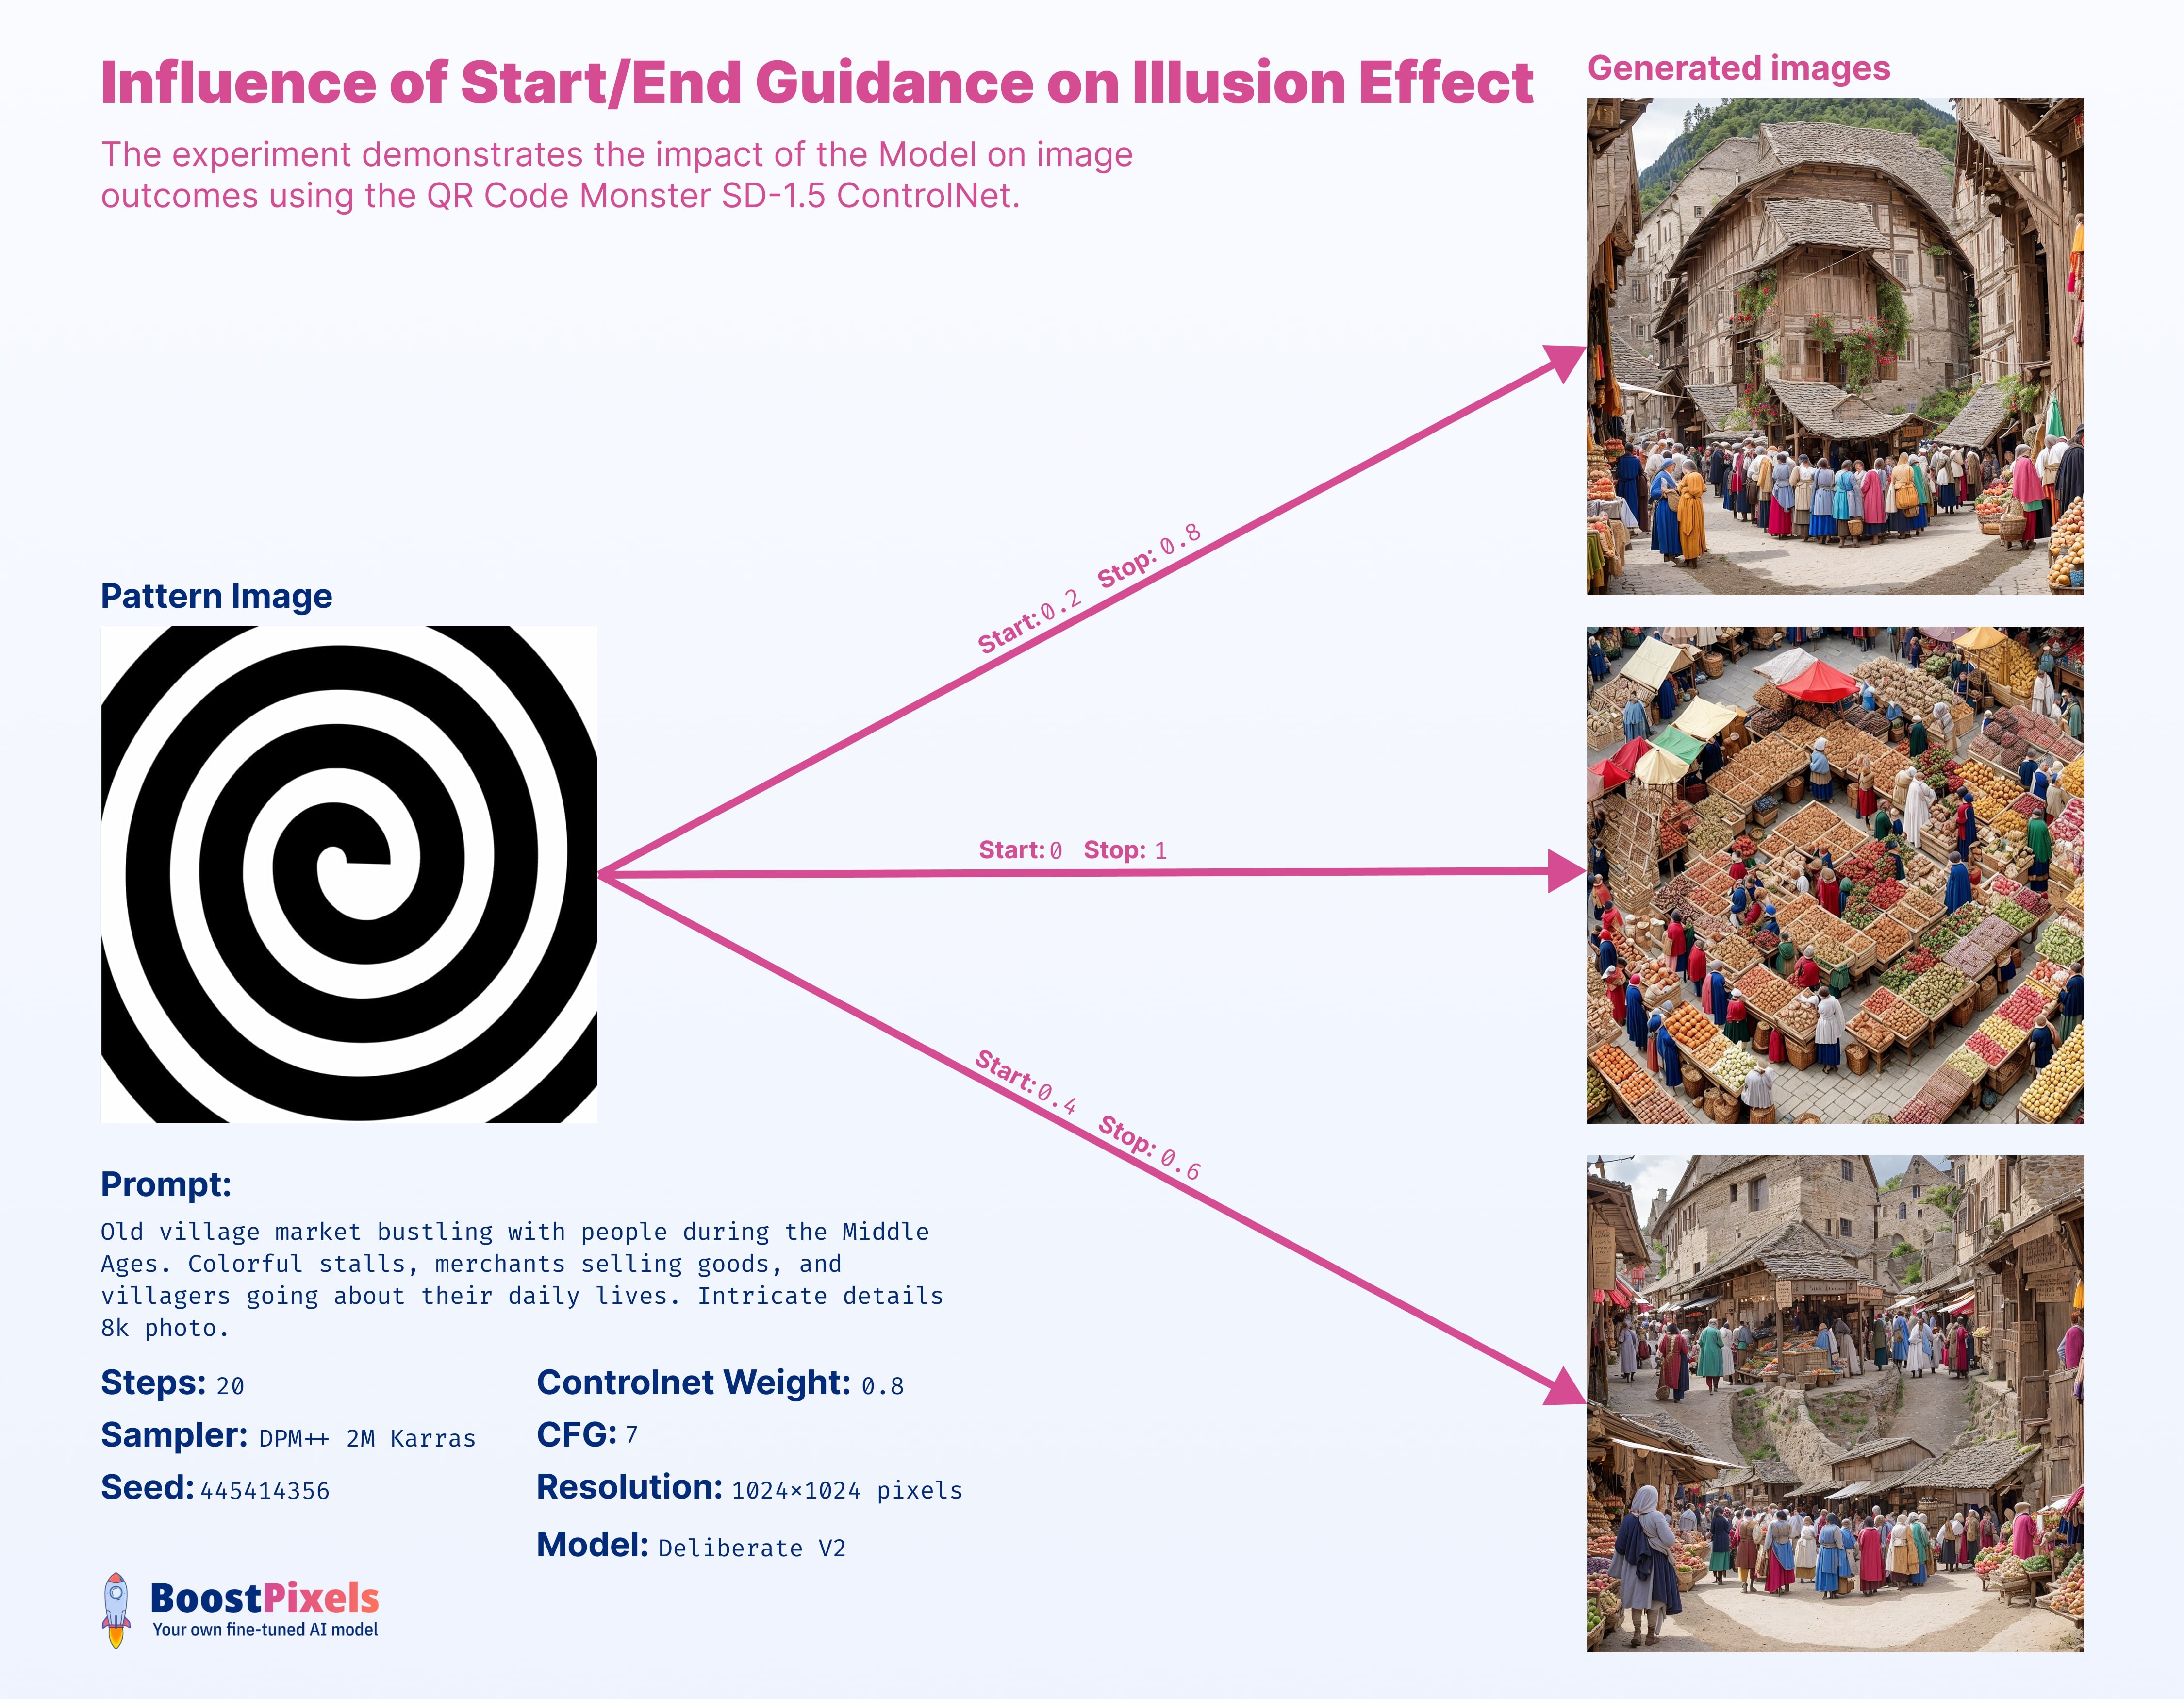
ControlNet Start & End Guidance
Guidance Start/End refers to the proportion of total steps where ControlNet has a role in the image generation process. For instance, a range of 0 to 1 indicates that ControlNet influences the image generation throughout all the steps, based on the ControlNet Weight value and other parameters.
You can also choose to have ControlNet guide only specific segments of the process. Let's say you start at the 20% mark and conclude at 80%. This means, if there are 20 steps in total, the first and last 4 steps would be executed without any ControlNet input.
This selective guidance can be useful, especially when aiming for a visual illusion where the initial image is perceived differently.
Conclusion
It's essential to understand the relationships of these parameters. Recognizing that they don't operate in isolation but interact with one another is pivotal for generating the desired image. Through experimentation and gaining intuition over these parameters, you can unlock the vast artistic potential of your imagination.